
How to manage the users list - First Part
The tutorial on how to manage the users list is divided in two parts:
- The first part is to create the hierarchical structure of your organization (optional).
- The second part consists of creating and inserting user data.
In this article, we will describe step by step the procedure of creating the hierarchical structure of the organization chart, and subsequently we will analyze the user creation procedure.
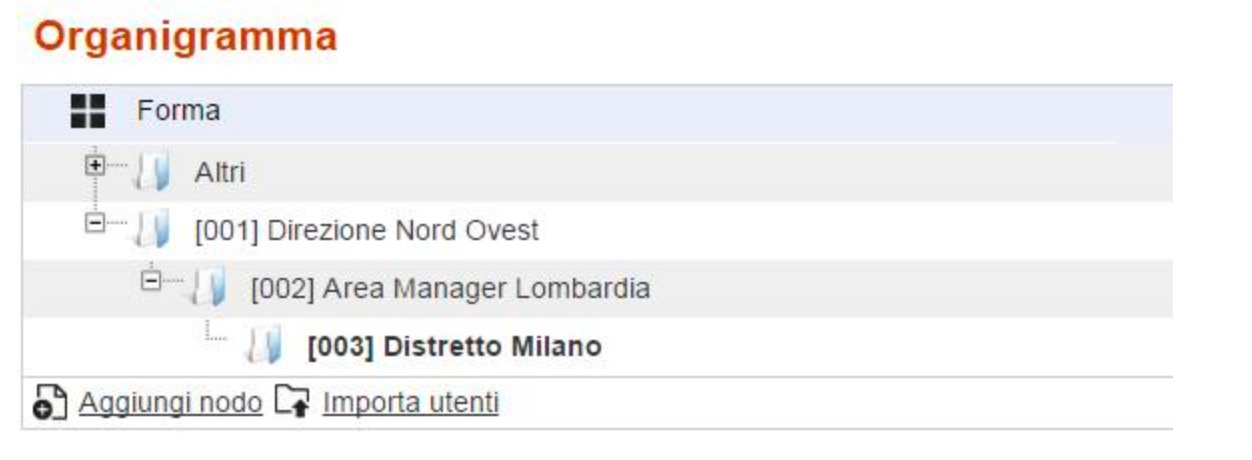
Let's take as an example the creation of a hierarchical structure of 3 levels by mapping it for simplicity with geographical parts of Italy: North / West Headquarters -> Area Manager Lombardia -> Milan District
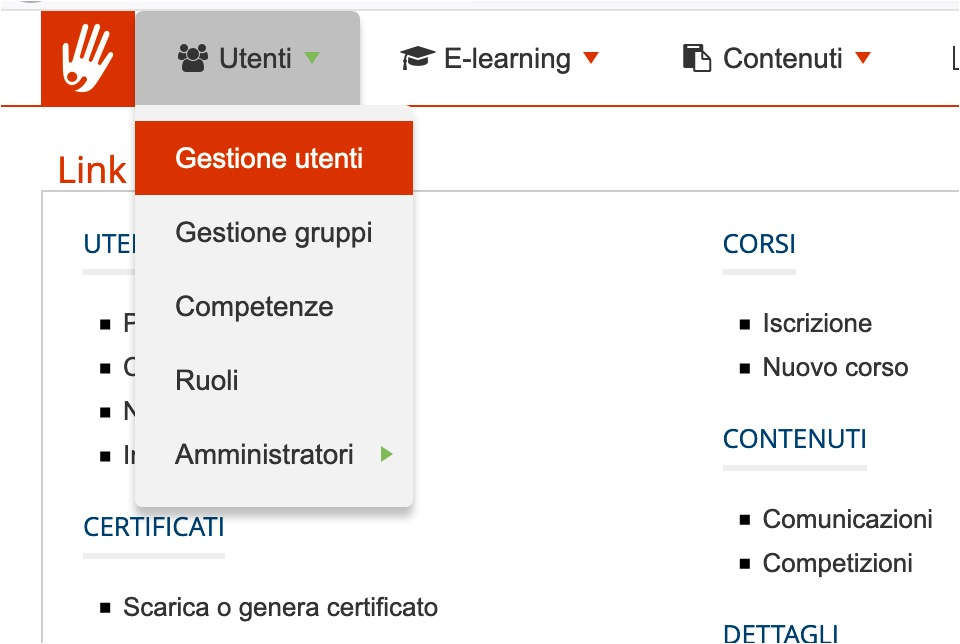
Go to Administration / Users/ Users Management
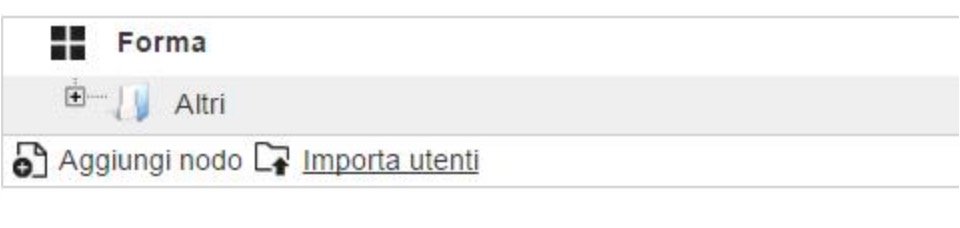
At the top of the page, insert the first node under the folder root “Forma” in the “Organization chart” section. Please note that you can rename that folder as you wish.
To create our first node, just click on the “Add node” button, after which a screen will open for entering the organization chart code and organization chart name for each of the languages used on the platform. It is possible to associate a different graphic template to each node of the organization chart, after creating customized templates.
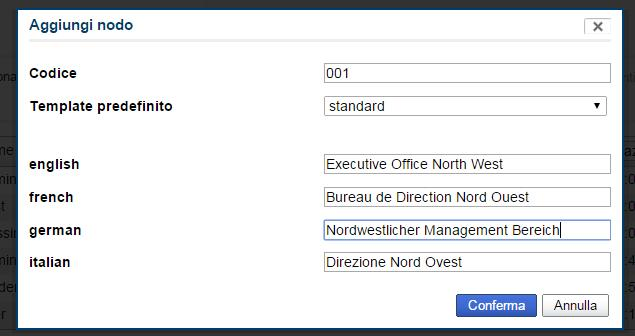
The organizational chart code as well as descriptive functions of the structure has an important role in a possible process of automatic subscription to the platform by users, which we will see in a dedicated tutorial. It can also be used as a unique identification in case you want to synch your LMS with your HR Management System or any third-party system.
At this point it is possible to insert another node at the same level as the previous one (eg “North East HQ”), or to create a sub node, as we will do in our example.
To do this it is necessary to click on the newly created node and click on the “Add Node” button, the procedure is exactly the same as the one previously carried out and will be repeated cyclically to create further sub-nodes
At this point it will be possible to create or import users within the nodes that we have created and through user profiling create hierarchical relationships between users that have effects on the use of the platform, from enrollment to courses to the possibility of filtering reports.
The creation of a hierarchical structure such as the organization chart therefore has a strong impact on the whole use of FormaLMS.
It is possible to associate already existing users to a new mode using the highlighted button

It is also possible to associate user custom fields and define whether these fields should be used for users belonging to a node, whether they are mandatory or not, whether they are visible to users or not, using the highlighted button

Finally, it is possible to modify the node created at any time using the modify button or to delete the node only if this is an empty node. The button is made available only for the nodes that satisfy this requirement.
