
How to create a classroom course with editions
When it is necessary?
In the event that there is a need to create multiple editions for a single course, for example because a classroom course takes place in different cities and on different dates. How should we proceed?
Classroom course creation
To access the course management, click on the menu Elearning> Courses> Courses
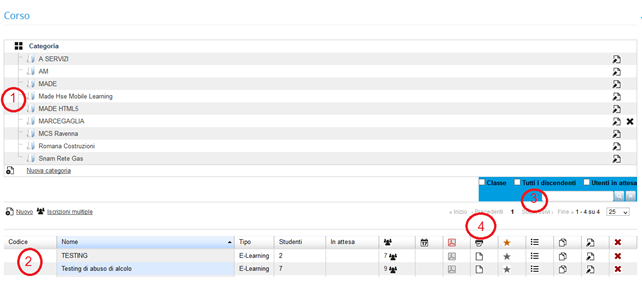
- List of course categories
- List of courses in the selected category
- Research on courses in the selected category
- Print course certificates
For “Class” courses, the highlighted column will show the number of editions available for each course:
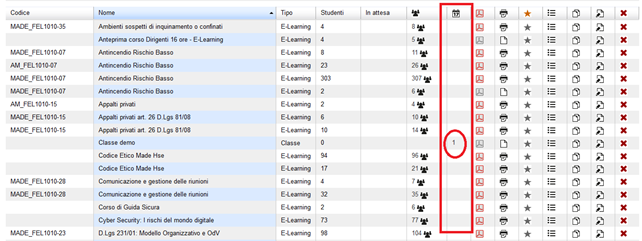
Click on the number of editions available to view the list (if you need to create the first edition, the number will be 0).
- Click on the “add” link to insert a new edition
- Click on the number of subscribers to access the registration management
Insert a new edition
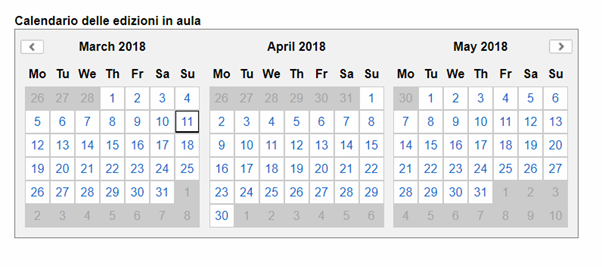
On the course list page, click on the add link and fill in the required information.
In particular, select the date or dates on which the course will be held.
Method of course completion
The method of course completion can be defined from the drop-down menu:

- web test (i.e., enter a test on the platform, and it will be the test for completing the course)
- test on paper (it's just a label, inserting “on paper” means you'll do it offline).
- No test
So, the course completion occurs when the user performs a test on the platform (which must be an end-of-course marker at the end of the course) or manually when the administrator acknowledges the actual presence in the classroom, see paragraph 4).
Start and end times
Click the “Next” button, and set the start and end times of each classroom day (optional):
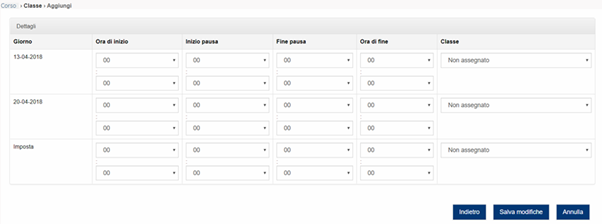
In the “Class” column, you can set the classroom in which the course will be held.
The classrooms are set up from Elearning> Locations (the location, for example the city) and then adding “classes” (the actual classroom).
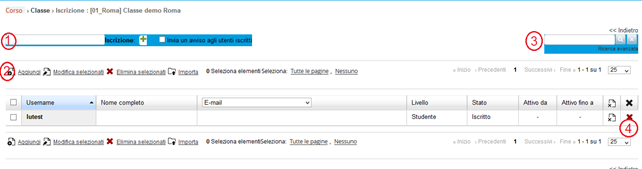
Enroll the students
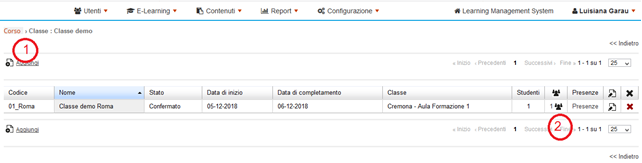
To enroll students in a course edition, access the enrollment management page (2):

From this page, you can:
- Quickly enroll a single user by entering their username
- Sign up more users by clicking on the “add” link, which will open a page for selecting individual users or entire organization chart nodes
- Search among registered users
- Remove a user's enrollment in a course (red “X” icon)
Attendance management and classroom register printing
At the end of a classroom day, the teacher can access the online attendance register by clicking on the appropriate link (1)

Select the users who were actually present in the classroom on each day.
It is also possible to export the attendance sheet to Excel by clicking on the appropriate button
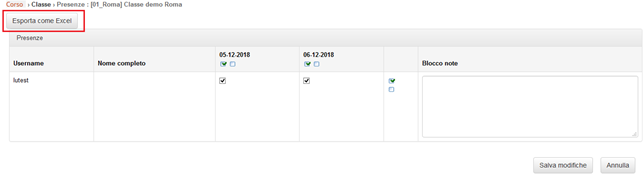
NB: You can select / deselect all users using the appropriate checkboxes located above each column (select / deselect all users on the same day), and at the end of each row (select / deselect a user on all days of a course)