
Event booking
The “Event Booking” module allows teachers and administrators to create a system of physical events in which users can register through the platform.
To configure an event you need to follow simple steps, let's see them together.
To make the organization of the events on the platform clearer and more orderly, it is best to first divide them into categories. For example, if there are events relating to “Marketing and Communication” it will be appropriate to create the relevant category and then insert the event within it.
Let's first see how to create a new category.
Creation of a new category
Go to Administration / Booking Management / Category.
Click on the “Add” button and enter the name of the new category and then click on the “New category” button.

At this point we can proceed with the creation of a new event.
Creating new event
Go to Administration / Booking Management / Events
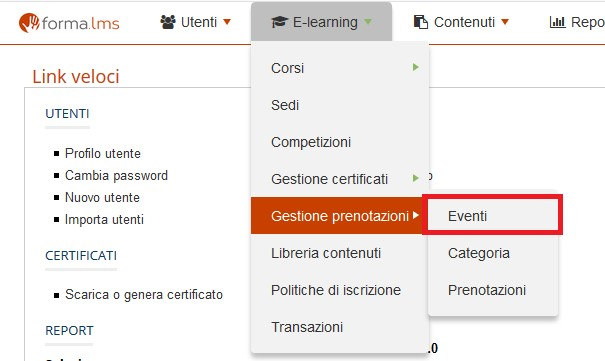
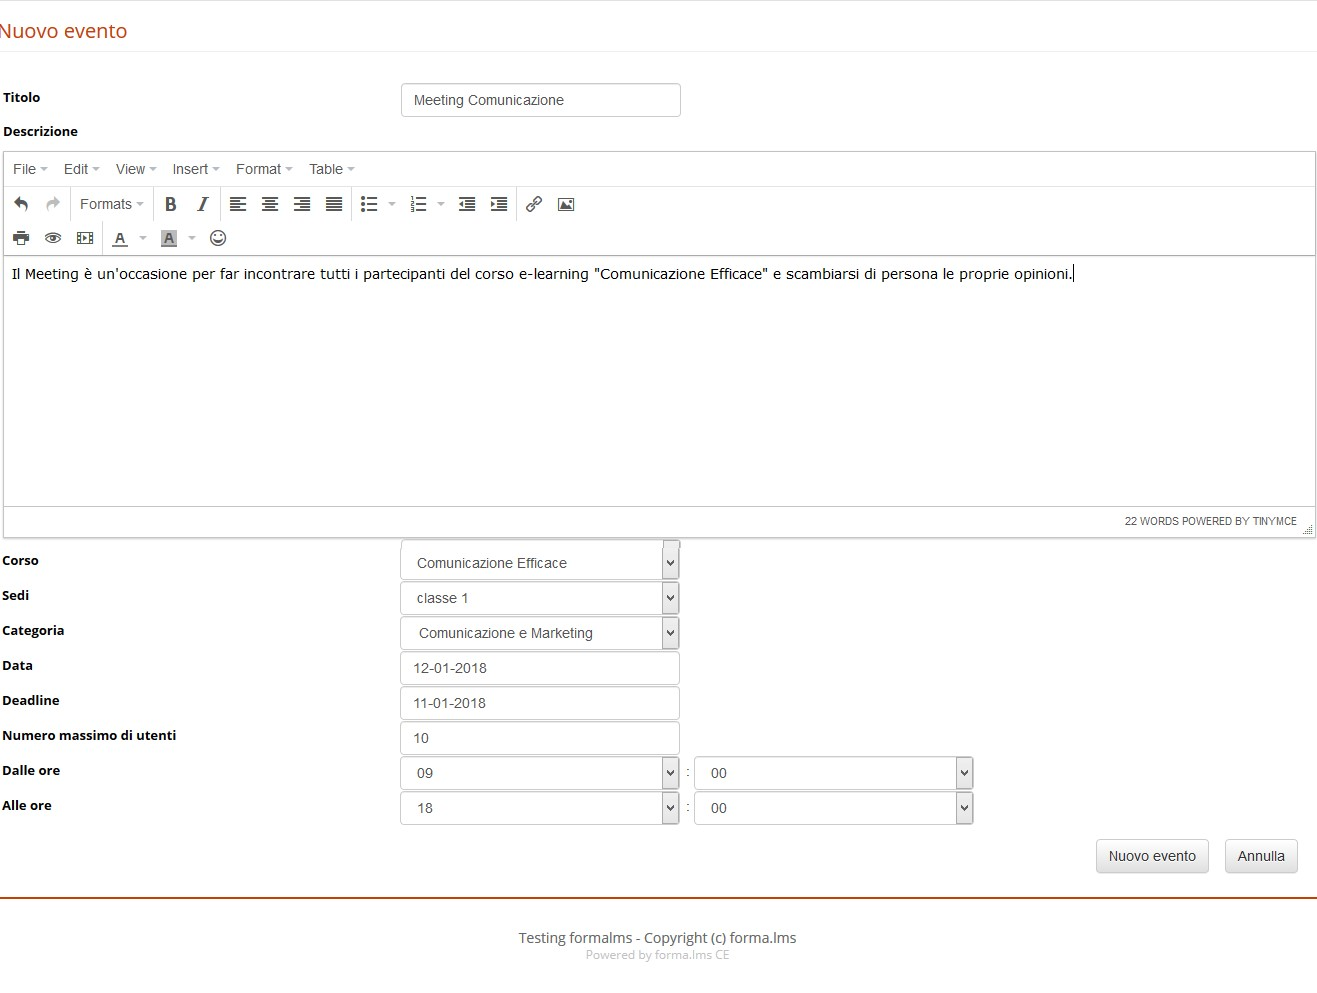
Click on the New event button and enter the data relating to:
• Title
• Description
• the course with which the event is associated
• Category
• Start date
• Date by which registration is possible
• Maximum number of participants
• Schedule
Using the active menu for each event, you can:
• assign users who will be able to register for the event;
• modify the data;
• delete the event.

How to assign users to an event
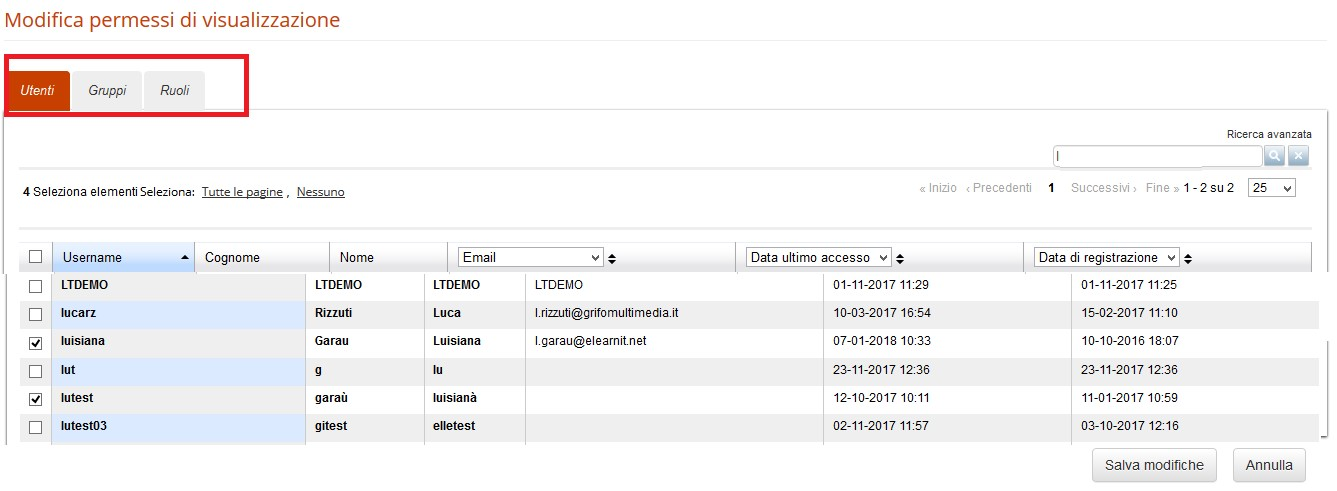
By clicking on the “Assign users” icon, we can indicate which users can register for that event.
We can select them individually or through the “Groups” or through the “Roles”.
In our example, we will insert them individually by putting the check in relation to each user who can register.
Management of reservations
To manage the booking of the event go to Administration / Elearning / Booking management / Reservations.

From this page you can create new events or manage the events already created, using the active menu that can be selected next to each event.

By clicking on the various icons in order, you can:
• check the list of members;
• directly enroll users;
• change the details;
• delete the event.
Attention: if the “Reservations” form is not present in the course menu, it will be impossible for users to register for related events.
Now that we have configured our event on the back end side, let's see how a user can book himself for an event on the front end side.
Subscribing the user to an event
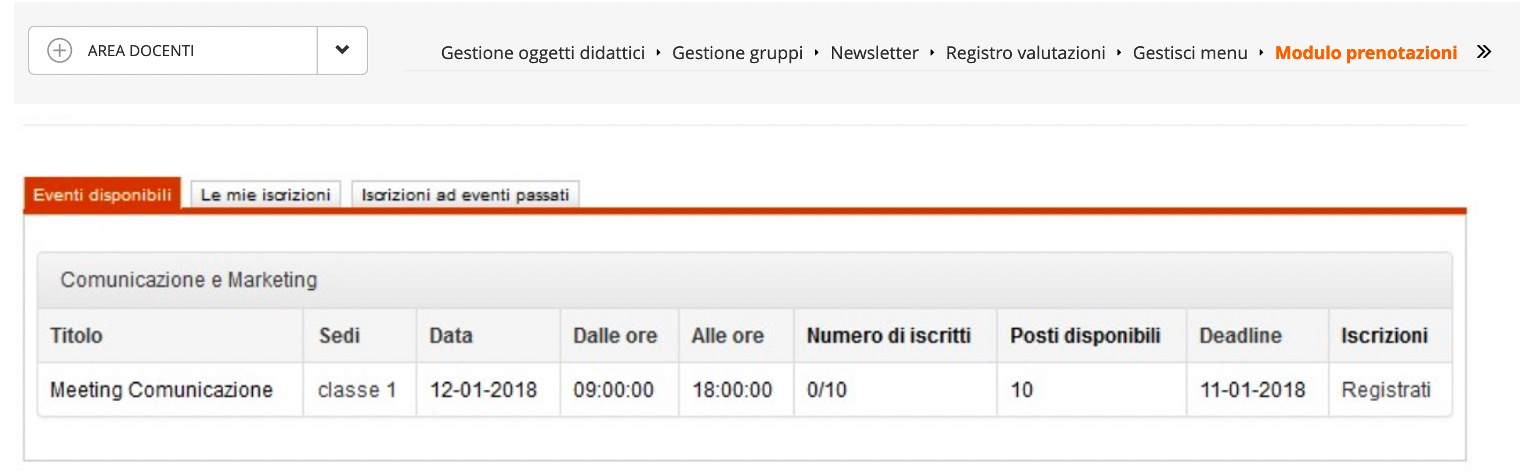
Following our example, the user must enter the “Effective communication” course with which the event is associated.
We have added the “Reservations” form in the “Social Area” menu item.
Of course, like all menu items, it can be assigned to any section of the course menu.
To book the event, the user must simply (obviously the user must have been previously assigned by the administrator to this event as written in the paragraph “How to assign users to an event”.
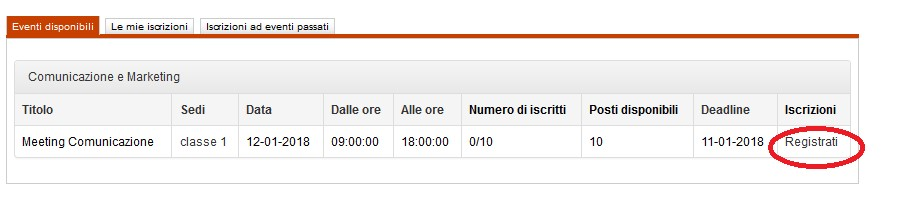
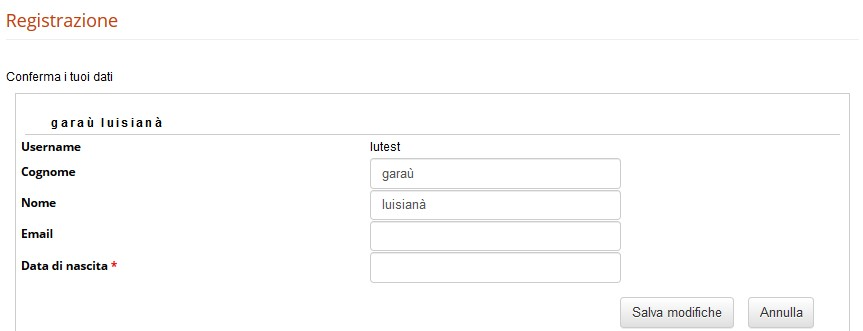
At that point, simply confirm your data and click on the “Save changes” button
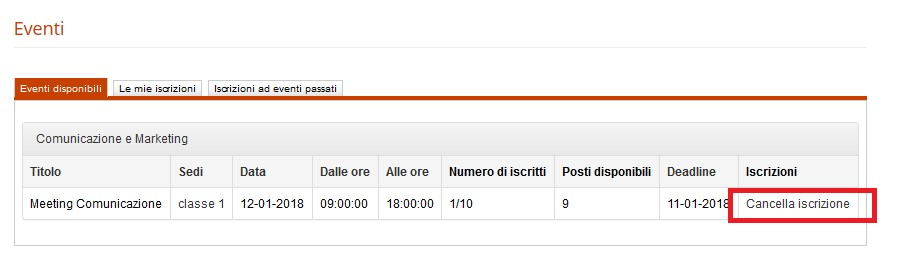
The user is thus registered for the event. If you wish to unsubscribe, simply click on the “Unsubscribe” button
The user of the Administrator, Teacher level or in any case with modification permissions has a number of more possibilities.
Front End event booking management
The administrator, once entered the course and clicked on the booking / registration management form, will see the following screen
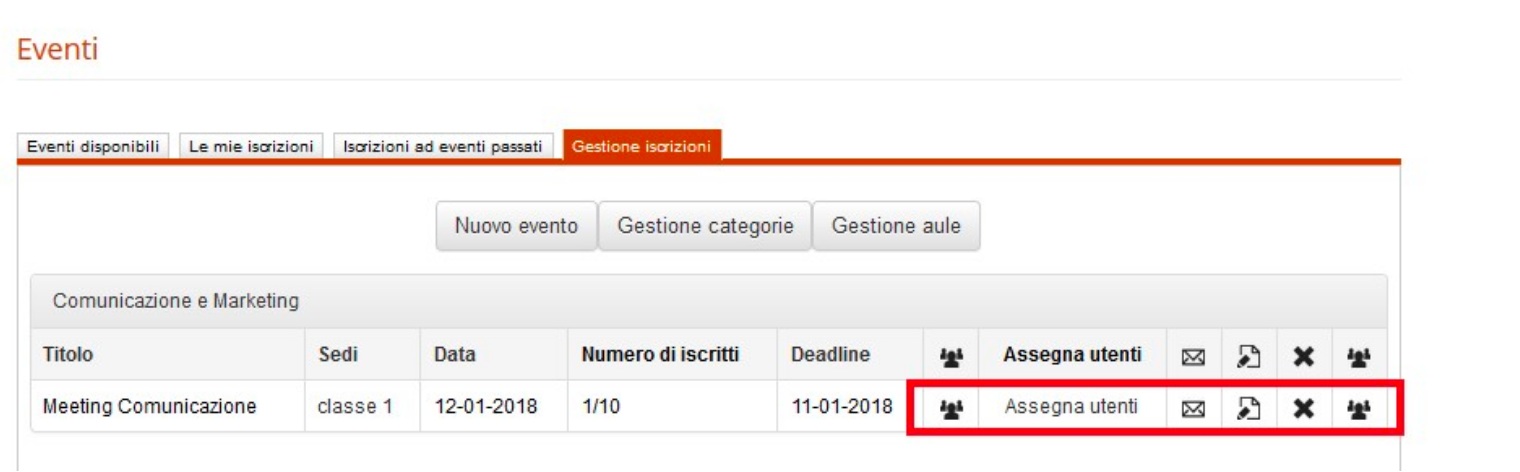
By clicking on “Show registered users”, you can view the names of registered users of the event
By clicking on the “Assign users” button, you can force the reservation of the event to users selected from among those
By clicking on “Send mail” you can email users registered for the event
By clicking on “Edit” you can edit the event
By clicking on “Cancel” you can delete the event
By clicking on “Who can register for the event” you can change the viewing permissions of the event