How to configure the menus of a course
This tutorial is dedicated to a useful feature that allows you to configure the menu within a course. Let's see step by step how to proceed …
In this tutorial we will see in detail the procedures for:
- Change the standard menus from the back end: administration area
- Modify front end menus: within a course
- Create a new menu
Change a standard back end menu
Go to Administration / Configuration / Elearning Configuration / Manage menu
We display the list of standard menus pre-set on the platform
How to change the menu settings
Click on the second icon to view the list of areas that make up the menu
For each area, we can modify both the title and (more importantly) the modules that compose it. For example, we want to modify the Student Area. How to proceed?
Firstly, click on the “Assign Modules” icon for the Student Area
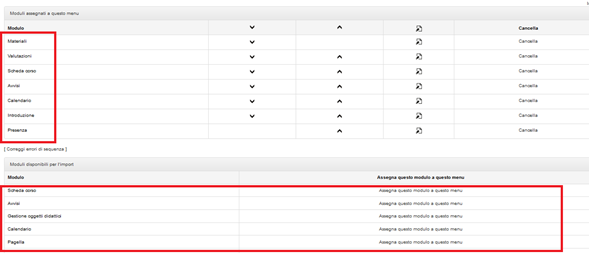
We display the list of modules assigned by default to the Student Area and a series of other modules that can be assigned according to our needs.
For each module we can change the settings (modification, display, creation, etc.) by clicking on the “Change settings” icon.
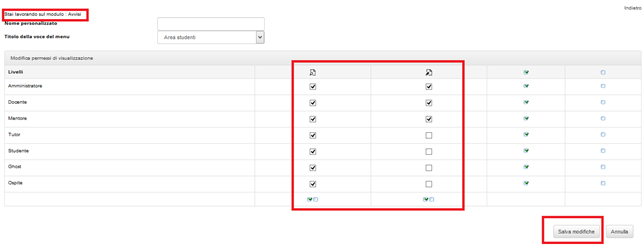
Let's say, for example, that we want to modify the “Announcements” module.
Click on the relative “Change settings” icon and at that point we will display the settings, in this case of displaying and modifying the module, which we will be able to modify.
The same procedure can be followed to change the settings of all the modules that make up the various menu items.
Remember: once the menu has been modified, it must be assigned to the course (or courses) by going to Administration / Elearning / Courses and clicking on the “Assign a new menu to the course” icon as described in detail in the Tutorial “How to create an elearning course”
Customize the menu within a course
For each single course, you can also customize the menu from the front end, let's see how.
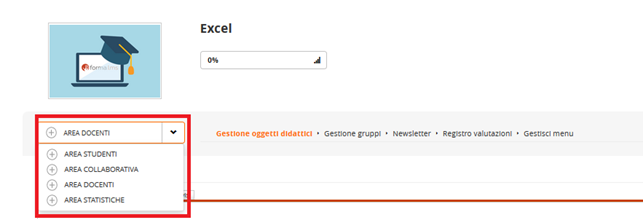
Once you have entered the course, we will display the drop-down menu with the different menu items on the left.
To modify any of the menu items, we will have to click on the menu item “TEACHER AREA” and then on the Manage menu module if it's available :-). If not, go back to the previous option :-)
At this point, the module customization procedure is identical to that described in paragraph 1.1.
In this case the changes take effect immediately, there is no need to perform other operations. Important: they only take effect on this specific course.
Create a new menu
In addition to the default menus already present on the platform, it is possible to create new menus according to our needs. Let's see how.
In order to create a new menu, you will have to follow this simple procedure:
Go to Administration / Elearning / E-learning configuration / Manage menu
Click on the “Add a new custom menu” button
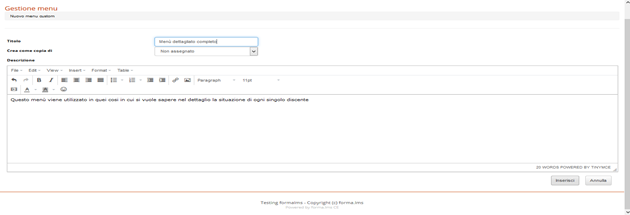
Enter the title of the menu and, if you wish, a brief description. Click on the “Insert” button
Once we have created our new menu, we just have to organize the different areas and assign the modules to each area.
Click on the Edit menu icon and then on New
Then insert the title of the menu item, for example Student Area
Once we have created our new Area, let's move on to assigning the modules to it.
Click on the “Assign modules under Student Area” icon and assign the modules according to our needs as described in paragraph 1.1
Remember: once the menu has been created, it must be assigned to the course (or courses) by going to Administration / Elearning / Courses and clicking on the “Assign a new menu to the course” icon as described in detail in the Tutorial “How to create an elearning course”


