
How to manage locations
1.0 Managing locations' learning activities
Locations are used in classroom courses, so that you can assign a specific location (a city, a company etc.) and a specific classroom (for example, blue classroom or the name of the classroom).
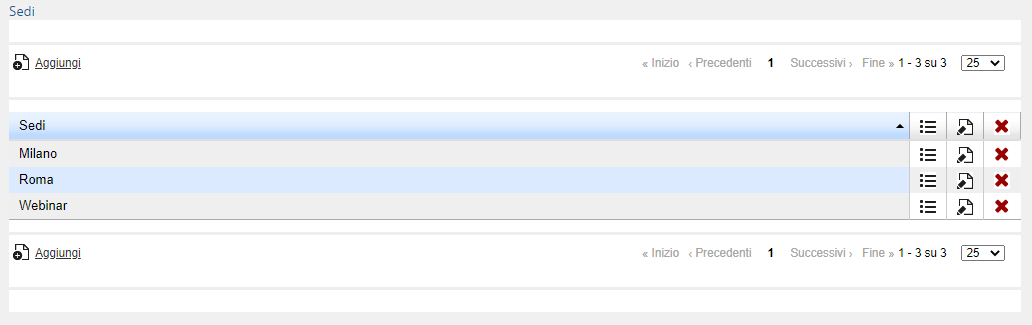
In the table you'll find:
Column Sedi (Locations): name of the location
Column  : if you click on this icon, you'll find the lists of the classrooms associated with the location
Column : if you click on this icon, you'll edit the name of the locations
Column  : if you click on this icon, you'll delete the locations and the classrooms associated to them
1.1 Adding locations and classrooms
Click on the Add link and enter the name of the location. Click on the icon in the line containing the location you just added to enter the page in which you can manage classrooms.

Click on the Add link to add a classroom. In the displayed page enter:
Name of the classroom (it’s the one that appears when assigning the classroom to appointments in the creation of editions for a synchronous course)
Enter all other required information: class, capacity, refers to, street, city, state, zip code, telephone number, fax, layout, classroom equipment, available equipment, notepad.
None of the above values are mandatory.
Click Save changes
1.2 Managing the classrooms of one location
Column: The corresponding classroom is deleted from the location
Column : it’s possible to edit the information regarding the classroom
Column : you access a page where you can view a schedule of the current classroom
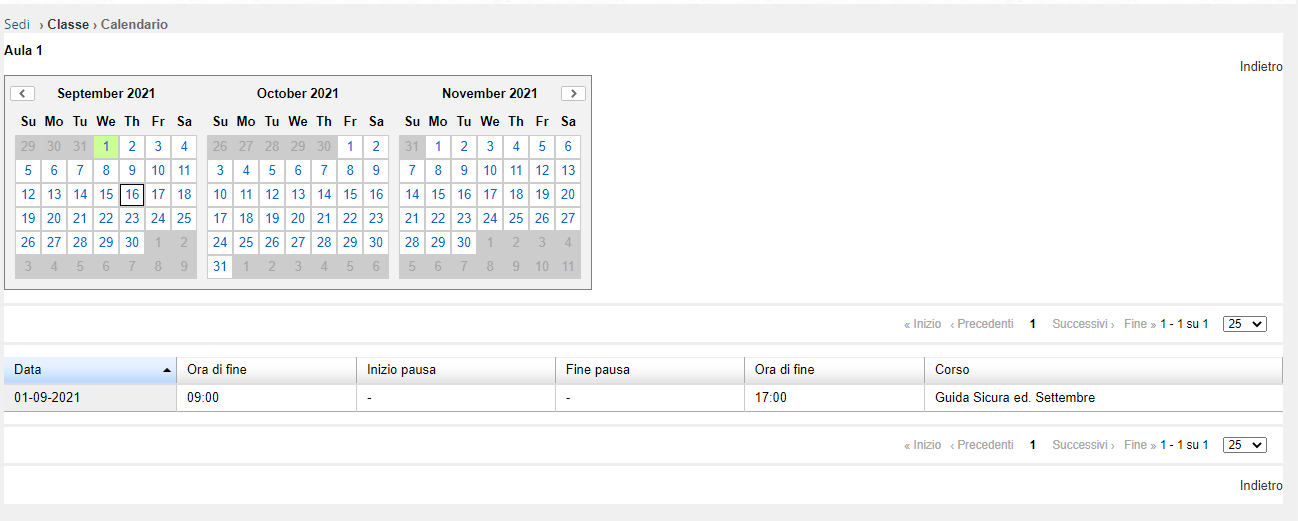
Column Sede: Name of the location