
Creating a course in Forma Lms
To create a new course on the platform, it is foremost important to know that the procedure is divided into two main parts:
- The first part is to create the course configuration (from administration)
- The second part, on the other hand, consists of uploading the teaching materials.
In this article, we will describe the procedure of “creating the course structure” step by step.
We refer to a further tutorial for the description of the second procedure.
Let's take as an example the creation of an “Excel” course
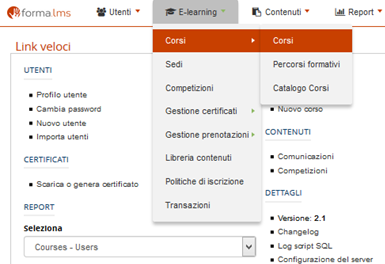
Go to Administration / E-learning / Courses / Courses
If you want to insert the “Excel” course within a category (for example inside a previously created “Office” category), you will need to click on the name of the “Office” category and then click on the “New” button
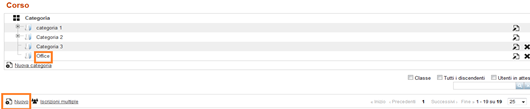
If, on the other hand, you simply want to create a new course without inserting it into any category, just click on the “New” button without first highlighting any category.
Now the time has come to configure the course by entering general data, such as title, period of use, etc.
Course configuration
In the first part of the screen you can enter the course code, the name of the course, the type, and status.
Assigning a code to the course can be useful to identify the course faster, especially if there are many of them on the platform.
In our example, we will simply attribute the code: 01
By setting the status “Confirmed” or “Available”, the course will be visible to users while setting the remaining states, canceled, concluded, under construction, the course will not be visible to users.
In our example, we will leave the course in “Under construction” mode and, only after completing the whole procedure, we will change it to “Available”

In the central part of the screen, there are several sections related to the course. The sections of interest are firstly “Enrollment to the course” in which it is possible to set the enrollment methods:
Admin only option : This option is chosen when you want to register for the course only by the platform administrator. A user entering the platform will not be able to independently enroll in the course. In our example, we will choose this option and only the administrator will be able to enroll users in the course. (Regarding the enrollment of users to courses, we refer to the tutorial “How to enroll a user to the course”)
On approval option : This option is selected in case you want to give the user the opportunity to enter the platform and request registration for the course, but it will only be actually registered once the admin has approved the registration.
Free: Choose this option if you want the user to enter the platform and be able to independently enroll to the course.
It is also possible to set the opening or closing of the registrations or to set a period in which the user can register.
For example, if we want a course to start on 01 February 2020, but we want users to be able to enroll in the previous month, we would enter:
in the “From” field: 1 January 2020 in the “To” field 31 January 2020
In this way, the user can register for the course in January and start enjoying it in February. (In the configuration of the course that we are using as an example, the Excel course, setting the dates of “enrollment possibility” would not make any sense because, as we previously wrote, we have set the enrollment mode “Only admin” therefore the user does not will never be able to independently enroll in the course, even indicating a period of time).
The same subscription options can be set for unsubscribing / unsubscribing.
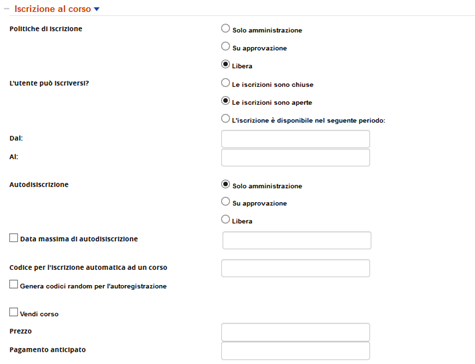
If you want your course to be sold on your LMS, you should flag the “sell course” checkbox and put a price on it.
You should also enable the catalog, because it's where your course will be on sale.
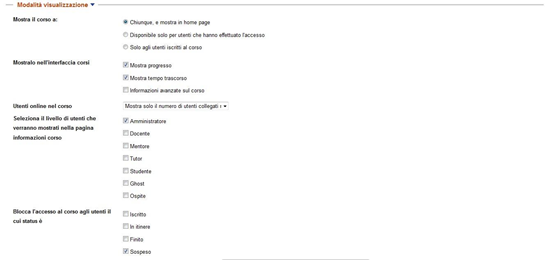
Another section of interest is “Display mode” where you can decide how the course will be viewed on the platform: for example by anyone accessing the platform or only by users who are enrolled in the course.
Or, you can decide whether the learner will be able to view the progress of use and the time spent in the course.
Finally, you can choose which levels are viewable in the course information or to whom to block access to the course
Important: users will only be able to self-enroll to a course if you have enabled the course catalog: only there they will see the “subscribe” button, the one they need to self-enroll.
The “display” option manages the visibility of your course in the general catalog: if you want to create, but you don't want it to be visible in the general catalog, set it to be only visible to subscribed users.
The “Time options” section allows you to set the start date and the end date of the course. So, following our example, in case you want the course to start on February 1 and end on June 30, we should enter the date 01-02-2014 in the “Start date” field and in the “Completion date” field the date 30-06-2014

Another section of major interest is “Upload documents” (Fig.7) where you can insert the banner of a possible sponsor, the logo of the course and the demonstration material.
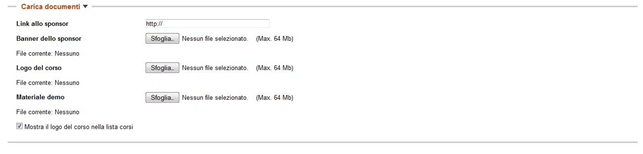
The optimal logo size should be 400 × 140 pixels
Finally, the last section to pay attention to is the custom option, where you will see the custom fields that you have associated with the courses. See the tutorial “Custom fields”

Once you have entered the data, remember to click on the “Save changes” button
Enrollment to the course as Administrators
Once the course has been created, you will be automatically enrolled as Administrators. If you want to act on a course that you have not created, you must first proceed to the second phase, then insert the learning material, enroll in the course just created as administrators.
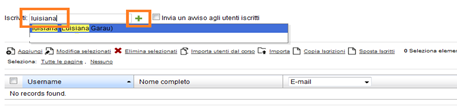
Go to Administration / E-learning / Courses / Courses and click on the enrollment icon

In the “Subscribe” search field, set your surname or userid and click on “plus”
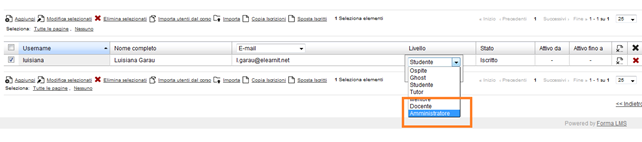
At this point, it is necessary to change the level from student to administrator
We just have to renew the invitation to pay attention to the other tutorial in which we will describe the procedure that allows the loading of materials in the course.