Creating a Course Report (Part One)
During the delivery of a course, it is often essential to know the progress of the user in order to know, for example, if it is appropriate to organize a reminder mailing for those who have not yet completed the course (it can be done from the same Forma Lms platform itself) or simply to know exactly the number of participants who have not started, who are in progress or who have completed. In Forma Lms it is possible to become aware of this thanks to the reports. Reports can be displayed online or downloaded in .csv or .xls.
Each report can be created by entering the data of interest according to your needs. In this first part we will see how to create a report of a course of which we want to know the details of each participant. In the tutorial “How to create a course report (Second part)” we will describe how to create a summary report of one or more courses.
For example, let's imagine that we need to know who the students enrolled in the Excel course are, the date of enrollment and the state of the users. Let's see how.
Creation of a course report (with details of the data of each individual participant)
Go to Administration / Elearning / Report
To create a new report, click on the “New” button
Enter the course title and select the type of report you want to create. If you want to have the details of each participant, choose “Users”. If you want a summary report of a course instead, you must select “Courses”, a typology that we will see later.
Select the users whose data you want to view in the report. If you want to report all the participants of the course, select “Report for all users”.
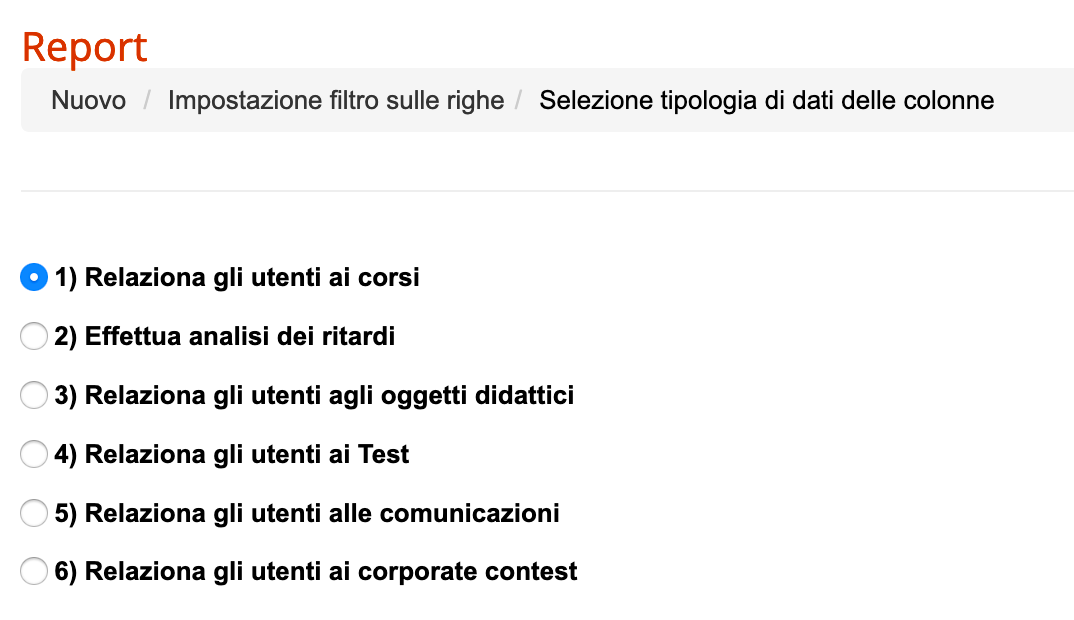
At this point you have to choose the type of relationship between the data you want to view. Usually “Relate users to courses” is used.
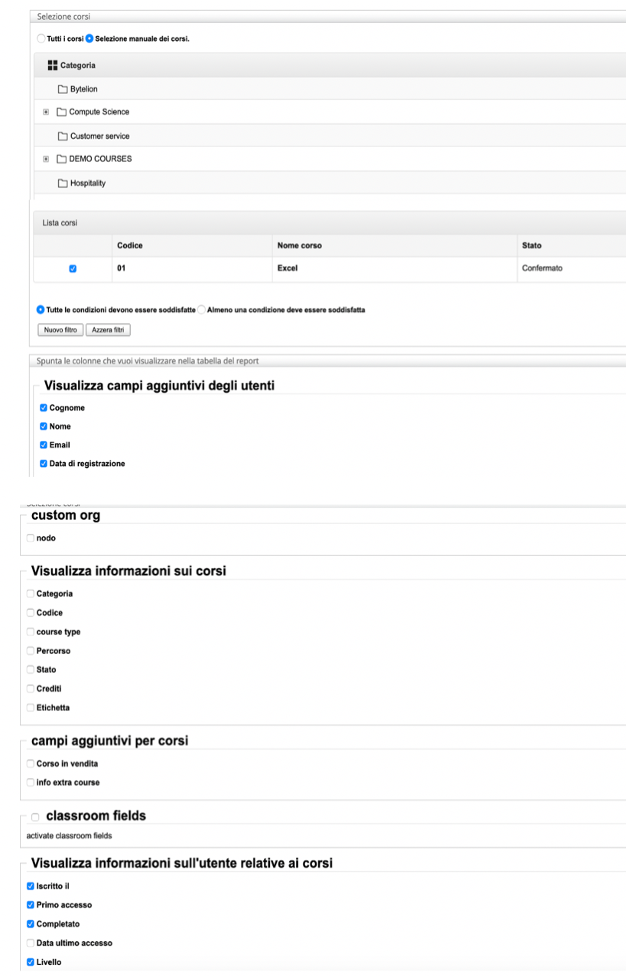
We first select the course we want to report on. Following our example, we will put the check on “Manual course selection” and consequently on the “Excel” course
After that we will put the checks in the filters that we want to be present in the reports.
Once the filters have been selected, you can choose among these options: display without saving; save and go back to the list; save and display; cancel
Export the report
Once the report is created, we can export the file to .csv or .xls.
Sending mail
It is also possible to send an email, for example a reminder to those who started using the course but have not finished it. At this point, we will select all the users who report the “In itinere” (in progress) status and click on the “Send email” button
We just have to enter the subject of the email and enter the content and then click on “Send email”.
Now the report and sending the reminder to the learners is complete.
Please refer to the tutorial “How to create a course report (Second part)” to see how to create a summary report of one or more courses.


