Reports
Administration reports creation and management
Report Management
Overview
Forma LMS provides a powerful and flexible report generation system, with these features:
- Create unlimited custom report
- Report generation wizard
- Automatically filter reports for assigned users and course
- Scheduling

Public: when a report is flagged as “public” it will be visible to all administrators and superadministrators. Non public reports can be viewed only by superadministrators and by the administrator that created the report
View: view the report
Export in CSV or XLS format
Schedule the report to be automatically sent by email to selected users
Edit: modify configuration options for the report
NOTE: Users with level Administrator will be allowed to see and edit onlyy report flagged as “public”, or created by themselves. Within the reports, administrator will see users and courses based on their user assignements. See Administrators management guide for details
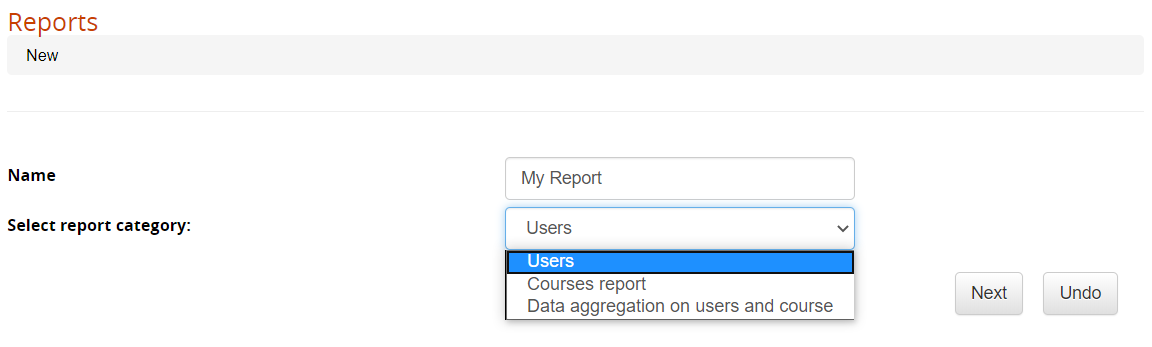
Create Reports
A four-steps wizard will guide you in report creation:
- Select the report category
- Select filter on the rows to display or data aggregation mode
- Select the report type: please note that it won't be possible to change the report type once saved
- Select column and criteria for the selected report type
Report Category
Forma natively provides three report “categories”, each based on a different logic for data displaying, and providing different report types.
Available categories are:
- Users-Courses: will display different data type for a list of users.
- Courses-Users: will display different data type for a list of courses.
- Aggregated: shows aggregated information for selected users and courses
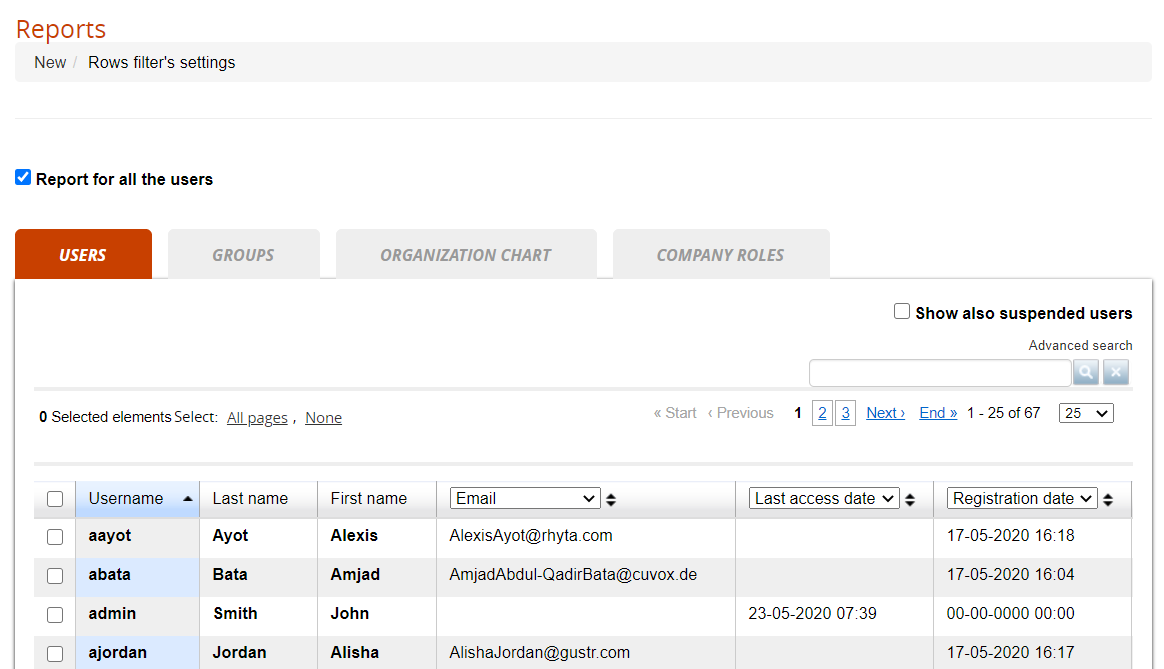
User Selector
For each category, it is possible to select the users to be included in the report.
In most cases, the best option is including “all users” and simply filter by course:
Report Scheduling
Reports can be automatically generated and sent by email to some users
You can create an unlimited number of schedules:
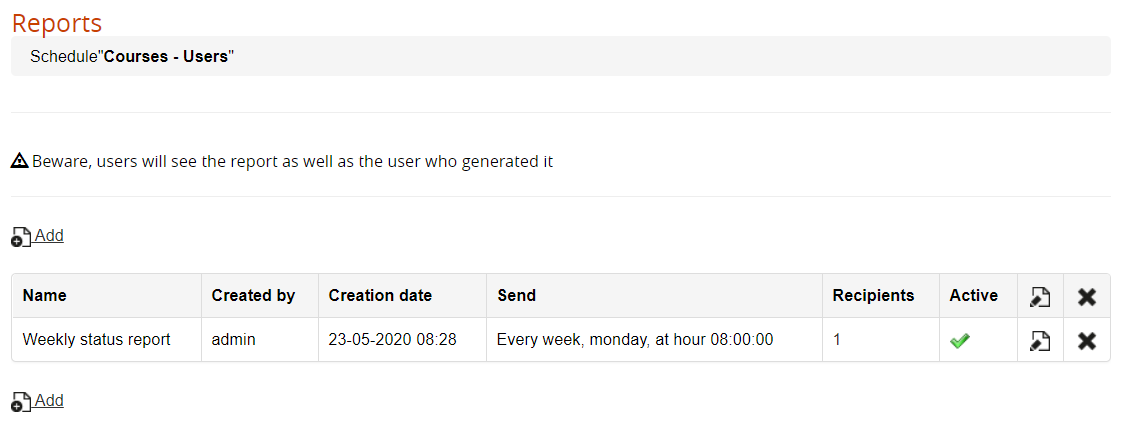
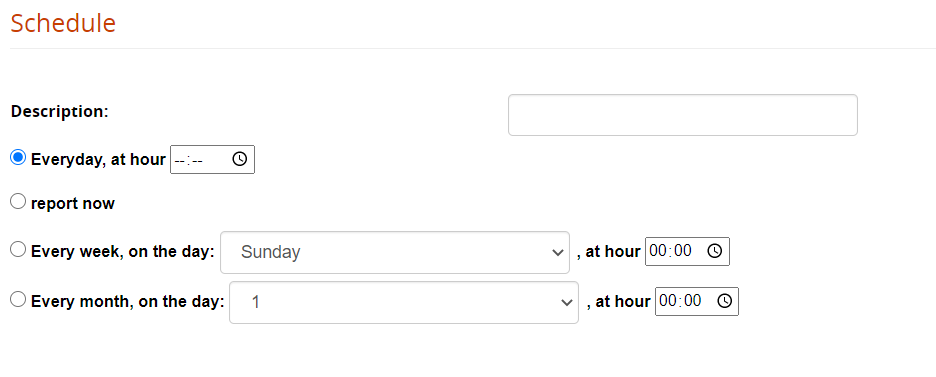
Upon schedule creation and edit, it will be possible to choose the users that will receive the report and set the date/frequency and time with the following settings:
Advanced Settings (Report Attachment)
Further settings to configure how the scheduled report might be attached to the sent email can be configured under:
Adm > Settings >System Configurations > Settings > Advanced
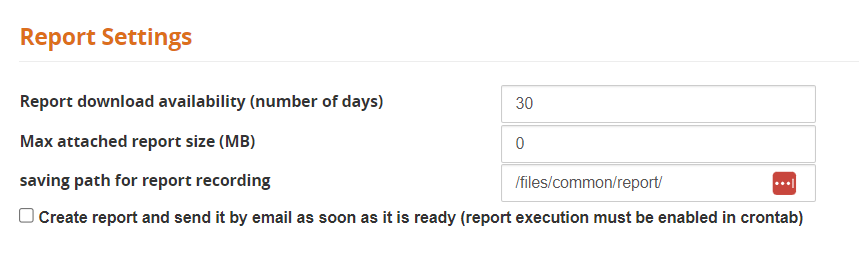
Set the "Max attached report size" according to your intranet or email account limits.
If value is set to zero, users will always receive a link to the stored file.
Cron setting
For the file to be sent, you will need to set up a cron-job on your server, calling the file:
[root]/cron/cron.report.php
User Reports
Reports in this category will show a list of users and their status on different items
Relates users to courses
This is the most commonly used report, that shows the status of each user on each course, based on the filters defined for users and courses.
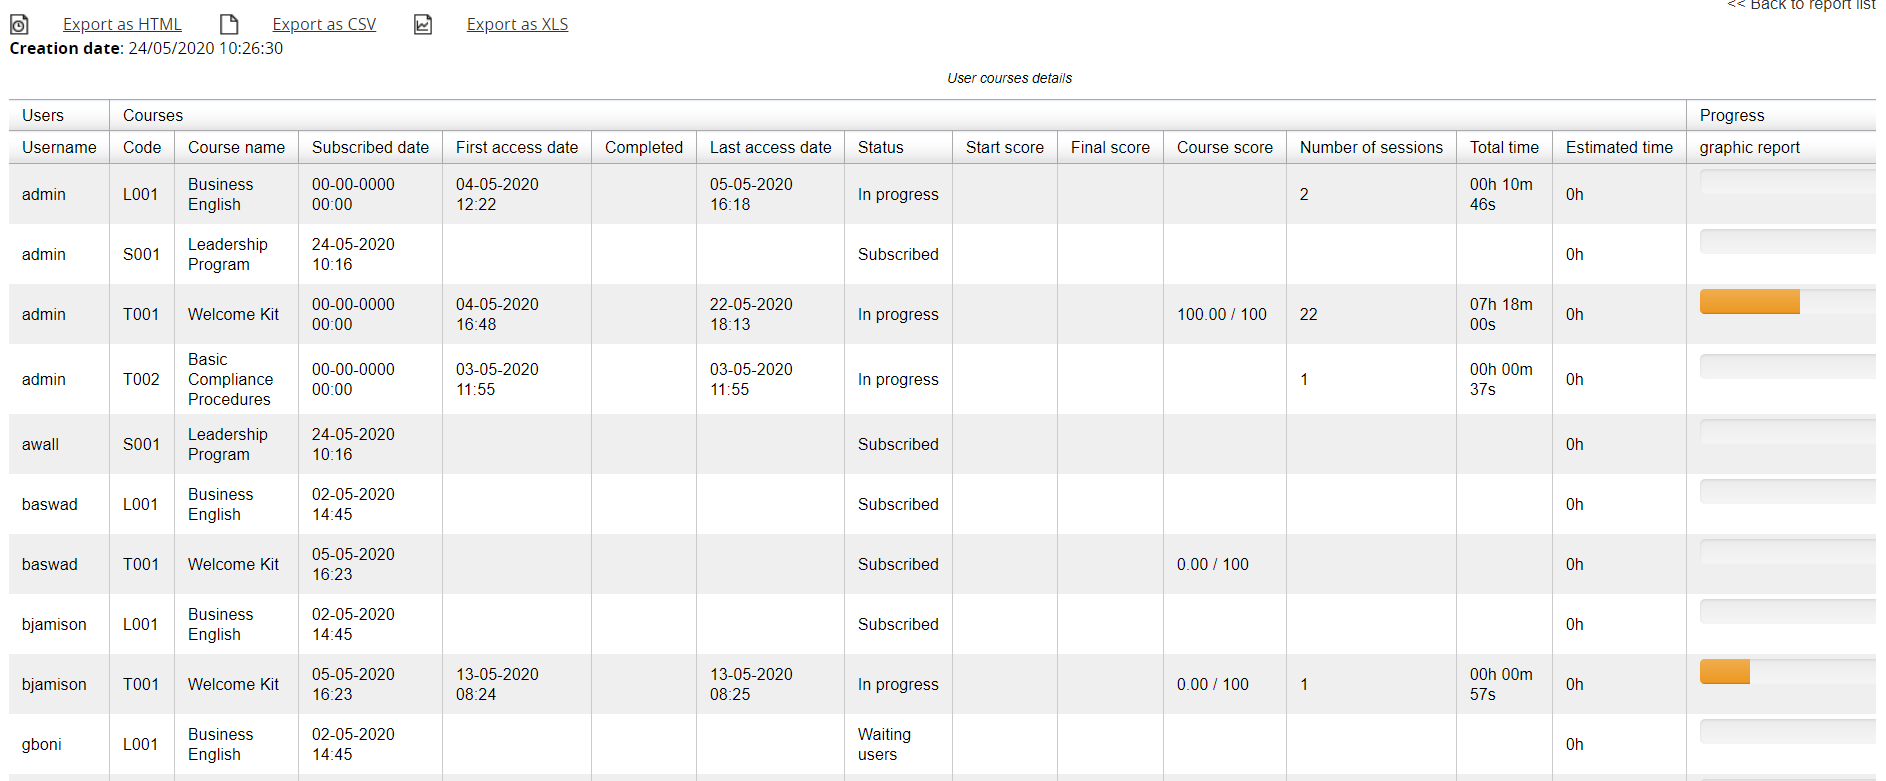
Example of report relating users to courses
Report Options
Select Courses: select to include all courses or only some courses
Conditions on selected courses: apply filters to display only users with specified conditions date or score conditions (i.e., filter only users subscribed after a certain date)
Show users custom fields: select which user personal information will be shown in the report
Custom Org: show data from the user org-chart custom fields
Display courses information: select which course information to show
Additional fields for courses: show data from the course custom fields
Classroom fields: show specific course information for classroom courses
Display user's information about courses: choose which information display about the user status on the course: status (i.e., completed, in progress), dates, scores, etc.
Progress: display user progress as percentage or progress bar
Other options: exclude suspended users, ordering options
Make delay analysis
This report will filter only users with specified completion status in a defined time range, to monitor user delays and send reminders.
Filter Options
It is possible to select users based on their status on the course:
- Users that haven't completed the course
- Users who haven't started the course
- All conditions must be satisfied
And based on the time condition of course and subscription:
- After (specify number) days from their subscription
- Course expiring in (specify number) days
- Course expiring on (specify date)
Relates users to Learning Objects
This report displays the status and progress of each user on the learning objects of one or more courses.
Report Options
Learning Objects types: choose which types of LO to include in the report
Select milestones: select to include or exclude milestones LO
Show users fields: show some information about the user
Display courses information: show some information about the user
Learning Objects Info: include information about the LO
Relates users to tests
Like the Learning Objects report, but filtered on test LO
Relates users to communications
Show if users have viewed communications
Relates users to corporate contests
Show user status on corporate contests
Course Reports
Relates courses to users

Example of Courses Report
Report Options
Time period: filter data from a selected period or time range
Other options:
- Group data per orgchart: will produce separate report tables for each orgchart node
- Show also suspended users
- Show only: Students — Filters count on users with level “student”
- Show: Assessments — related to the removed “assessment” feature — don't use
Display courses information: show information about the course
Additional fields for courses: show data from the course custom fields
Classroom fields: show specific course information for classroom courses
Display user's information about courses: shows further information about the course
Show statistics about courses: calculate course stats about user status and progress in each course
Relates courses with the teachers votes
Relates courses with users votes
Aggregated Report
This report will display aggregated data about users and courses
The following report types are available:
- Relates users to courses
- Course categories
- Years
- Relates users to communications
- Relates users to corporate contests