Layout & Templates
Managing Template & customizing forma layout
Templates
Forma templates are located in your forma installation under root/templates/[template]
Yon can create unlimited templates and assign them to different orgchart nodes and domains
Adding templates
To add a new template:
- duplicate the "standard" template
- rename your copy
Avoid editing the standard template, you may lose your changes during forma upgrades
Customizing Templates
- upload and overwrite images under \templates\[template]\images
- create a file named \templates\[template]\style\custom.css and add your custom styles
Template priority
When a user logs to the platform and multiple templates are assigned to nodes and domains, forma will load the template following this priority order:
-
Template assigned to the domain
-
Template assigned to the user node
-
Default template
In any other condition or unexpected configurations will be used the default template
Dashboard Configuration
The main settings for the dashboard configuration (from Forma 3.x onwards) are available under:
Admin > System configuration > Dashboard Configuration

You can create a new dashboard or:
- Clone/Duplicate
- Edit an existing layout
- Assign view permissions for each dashboard layout
- Delete an existing layout
Creating a new dashboard

- Dashboard name: Name of the dashboard. It's just for internal purposes, it's not visible to the users.
- Dashboard layout caption. This is the caption that appears when you hover on the dashboard button.
- Select a status: Draft/Published.
Duplicating a layout
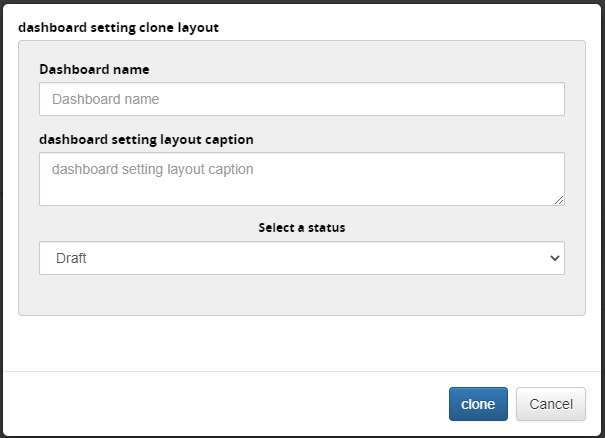
Duplicate an existing layout and set its Name, Description, and status
Editing a layout
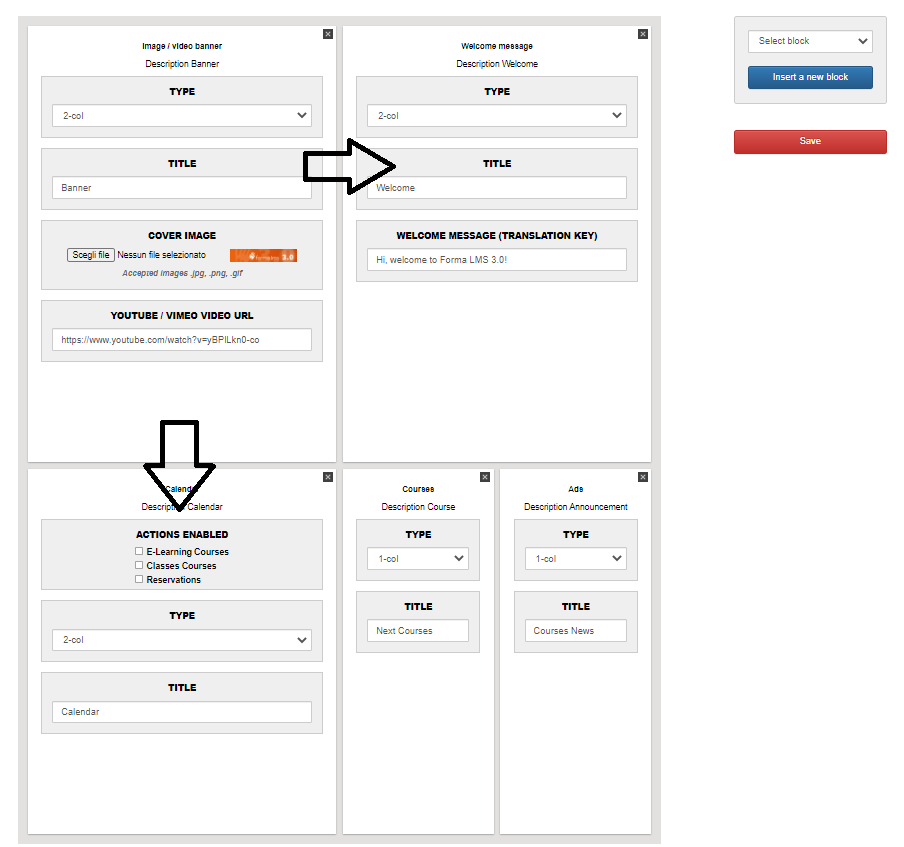
Adding a new block
You can delete blocks using the 'X' button, or you can create new blocks:
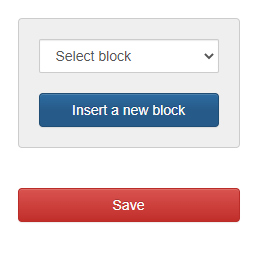
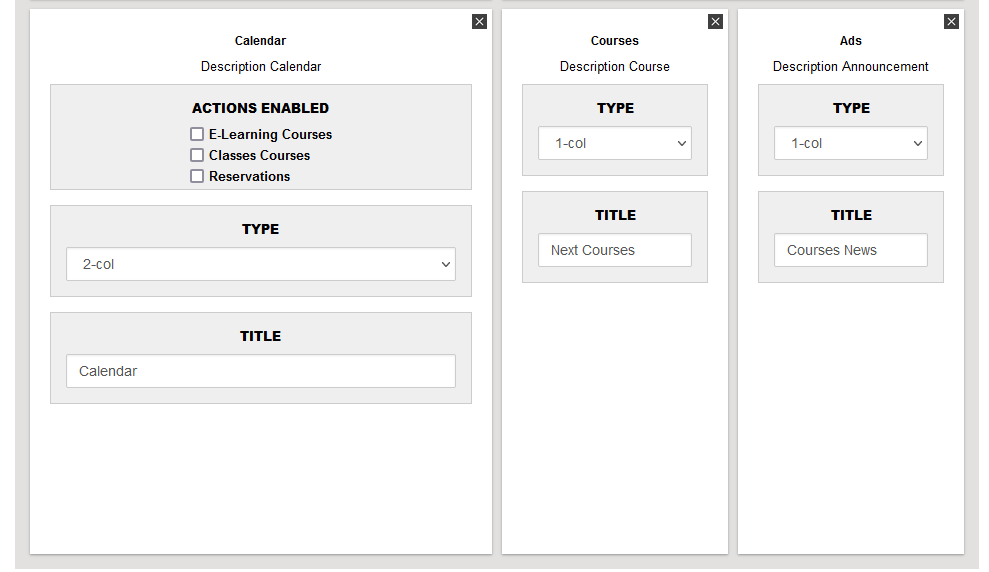
The available blocks are:
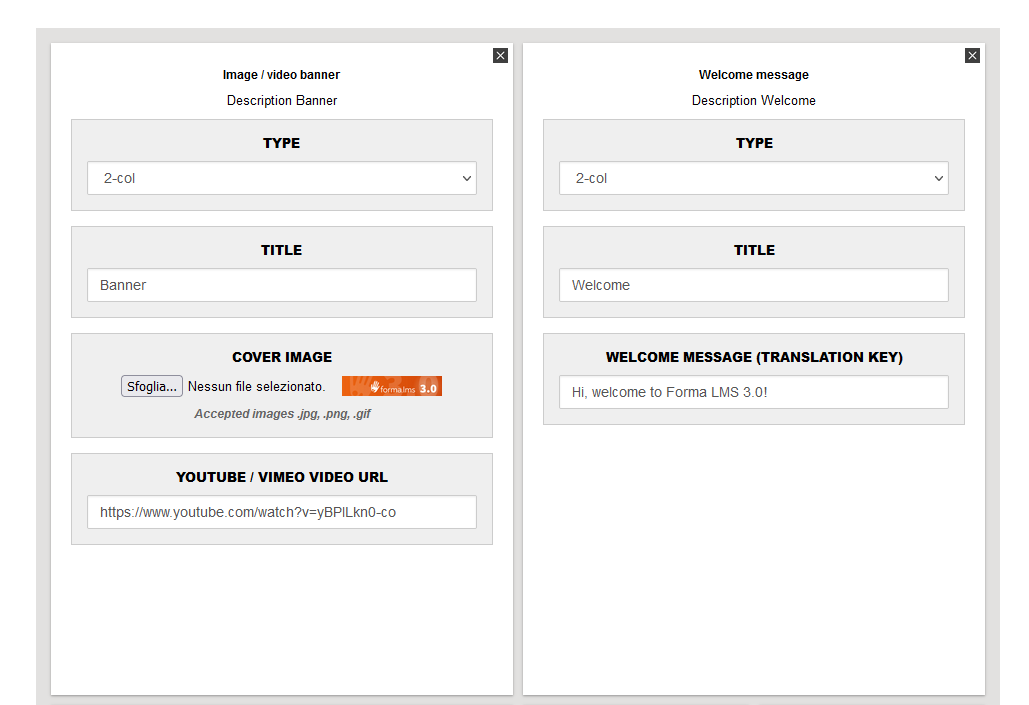
- Ads/Announcements: this block displays a list of announcements from the courses the user is enrolled to.
- Image / video banner: this block adds an image banner, that can be linked to a video opening in a popup.
- Calendar: this block displays courses start/end dates and classroom days on a calendar layout
- Certificates: this block displays a list of the latest certificate available to users
- Courses: this block displays the next courses about to start or close or classroom days.
- Messages: this displays a list of private messages received by the user
- Welcome message: this block sets a custom welcome message on the dashboard page. If you don't set a custom message, the default one from the languages will be used.
Concerning the welcome message, we recommend using and/or customizing the default text in the language management, because it can include the user's first and last name, and it can be localized according to the user's preferred language.
Editing blocks
For each block, you can set:
- Type: Number of columns
- Title: a title that will be displayed to users
- Specific parameters for each block
Block width and position
The dashboard layout is based on a grid of 4 columns:
- Width: each block will occupy a variable width of 1 to 4 columns, for a maximum of 4 columns occupied on the same row
- Position: Every block can be dragged and dropped horizontally or vertically.
Viewing Permissions
Set the users, nodes or groups assigned to view each layout: with this feature you will be able to assign different dashboard layouts to different users.
Example
This is a good example
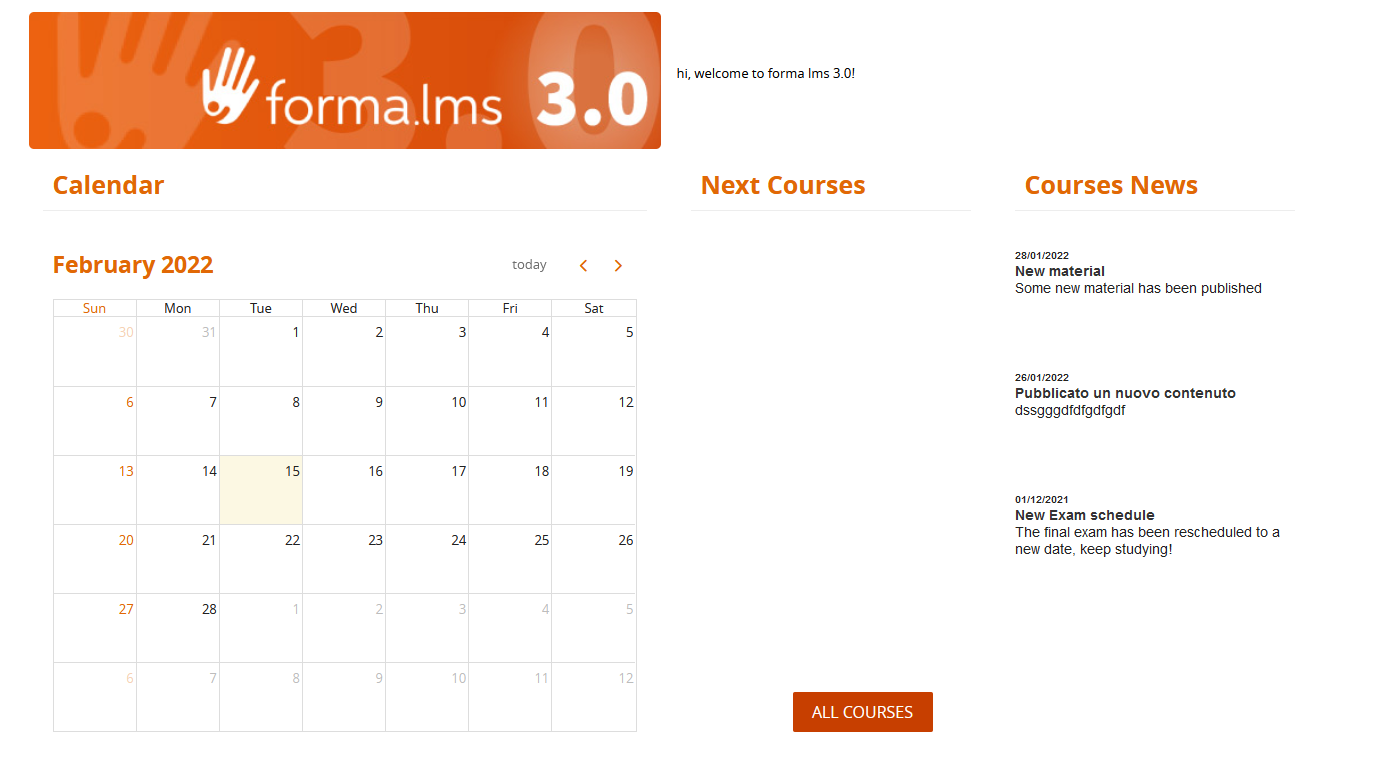
Let's see how it's configured in the backend.
On the first row, two blocks of 2 columns each. The Welcome message has been customized here, so this will override whatever message is in the language management.
Let's see the second row: three blocks, the calendar has 2 columns and the other blocks have 1 each.
User Area LMS
From this area, you can activate and set visibility options for most of the frontend layout modules.
Admin > Settings > Elearning Configuration > User Area LMS
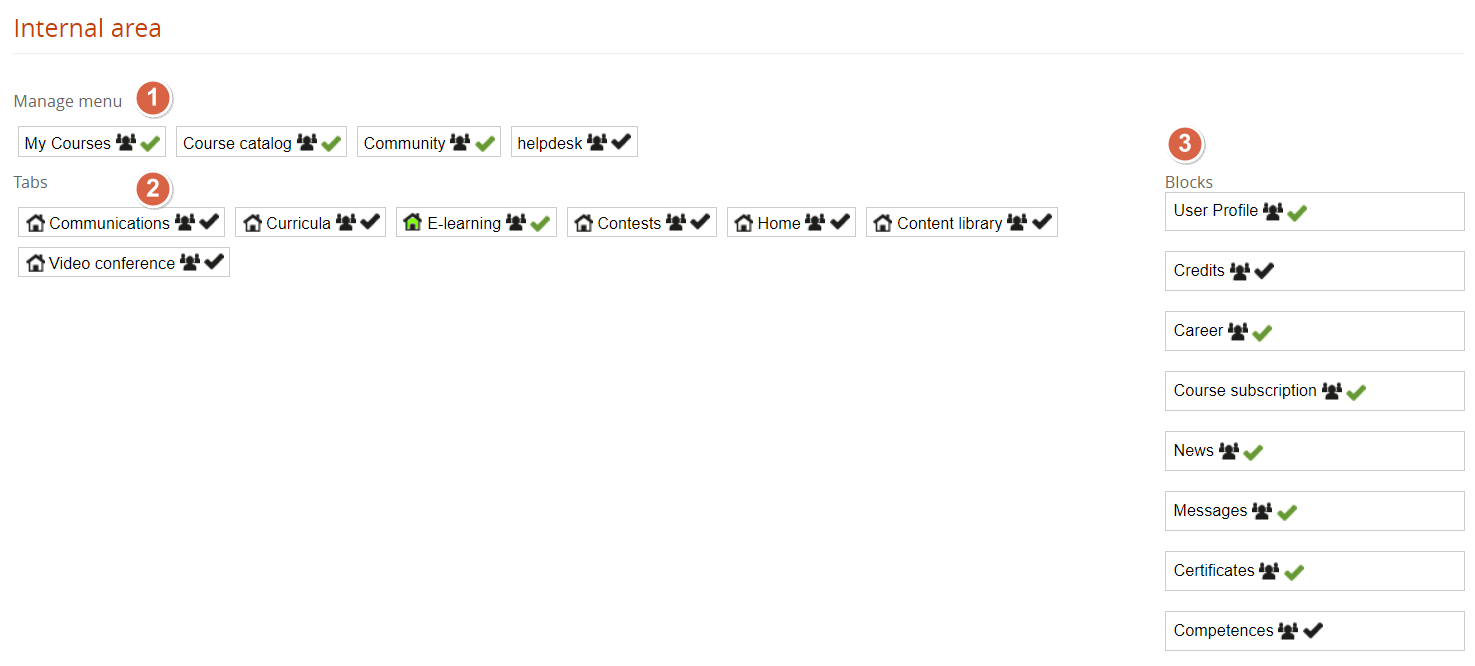
Main Menu Links
Activate / Deactivate the main menu items.
Click on the user icon to assign visibility on this item only to some users or groups.
MyCourses Tabs
Activate / Deactivate tabs for the MyCourses section
Click on the user icon to assign visibility for each tab only to some users or groups.
Click on the “Home” icon to define the default tab to be shown when opening “MyCourses”
User Panel Blocks
Activate / Deactivate blocks and buttons in the side user panel.
Click on the user icon to assign visibility on this item only to some users or groups.