**WARNING - MySQL Strict Mode** Until version 2.4.2 Forma LMS requires MySql **strict mode set to OFF**. Please make sure your hosting provider allows this configuration This restriction has been removed since version 2.4.3
**WARNING - MySQL 5.7 Settings** Using MySQL version 5.7 requires some specific configuration. Check [this thread](https://forum.formalms.org/12/13146.html?p=19982#p19984) for details
# Installation and Upgrade ## INSTALL PROCEDURE 1. Create the database on your dbserver: - If the db user has permissions, the installer can create the database for you - You can use any db admin tool, such as phpmyadmin If you use a prepackaged webserver on your PC, the default db admin link is http://localhost/mysql/ or [http://localhost/phpmyadmin](http://localhost/phpmyadmin) - Be sure you have your database parameters available (host, user, password, dbname) - The database must be defined with **UTF-8** encoding 2. Upload all the files in your root directory or subfolder. - If you want use at runtime FTP upload features, be sure you have your ftp parameters (host, user, password) - forma.lms web is protected with apache.htaccess files from unauthorized use. Often, dot-files are hidden from view. Check your environment and be sure that these files are also uploaded 3. Launch [http://www.yoursite.com/install/](http://www.yoursite.com/install/) *(of course you should type your domain, not “yoursite.com”)* 4. Follow installation instructions. Note: during installation, a **config** **file is created** in the application root directory. In case your root is missing writing permissions, you can download it from the link provided on the last installation step, and upload it manually. 5. To secure your installation, at the end of install, **remove or rename** the *install* and *upgrade* folders**Note: During the install procedure, the system will load XML file languages. Depending on number of language chosen, this operation can take some time in order to complete**
## UPGRADE PROCEDURE 1. Make a full backup of db and files, and make sure that you have a full backup that you can trust and recover if needed 2. Export the language files (if you did any customization), to import them again after the upgrade 3. Delete all files and directories excluding - the*/files* folder and *all its subfolders and files* - the *customscripts* folder - your own templates in *templates/<yourowntemplate>* (if you have any) - the *config.php* file in root folder 4. Upload the new files - The upgrade procedure needs resources under install folder, so make sure to also upload this one - Forma.lms web is protected with apache.htaccess files from unauthorized use. Often dot-files are hidden from view. Check your environment and be sure that also these files are uploaded 5. Launch [http://www.yourwebsite.com/upgrad](http://www.yourwebsite.com/upgrade)e *(of course you should type your domain, not “yourwebsite.com”)* 6. Follow upgrade instructions. 7. As a final step of the upgrade, the procedure imports and updates all languages previously defined with the standard translations. 8. At the end of the upgrade, go to the “Administration panel/Language” to import your own language files 9. To secure your installation, at the end of upgrade, remove or rename the *install* and *upgrade* folders. The procedure may change the *config.php* file for you, or it may ask you to download it and upload to the web root folder, if not writable. ### Upgrade to version 4.x Forma 4 introduces a completely rewritten install and upgrade component based on the Doctrine ORM. Since it is a **migration**, upgrading to Forma 4 will be only possible starting from version 3.3.25. Upgrading from previous versions you’ll need to upgrade to version 3.3.25 first, and then to Forma 4. An external legacy upgrade component is planned to be released to manage direct upgrades from previous versions. ### Upgrade from version 2.xx During upgrade from forma.lms 2.x to forma.lms 2.2 and later, pay attention to **a) Template** Template 2.0 and 2.1 are not compatible with 2.2 During the upgrade, the site template is updated to “standard”. Minimum template version required (see release notes) ### Upgrade from version 1.xx During upgrade from forma.lms 1.x to forma.lms 2.xx, pay attention to **a) Database** after upgrade the DB are not full compatible with forma.lms 1.xx, and there is no path to go back. Made a backup before upgrade **b) Template** Template 1.xx are not compatible with 2.xx During the upgrade, the site template is updated to “standard” **c) Dropped feature** **d) Customscripts** All customization made through customscripts/ must be reviewed and ported to the 2.0 current version. forma.lms does not check base version file with your customized version in customscripts folder. There is no version check support for customscripts files **e)** The update detects the use of the **mysql / mysqli driver** and changes the configuration appropriately At the end of the upgrade process, check all the system configuration settings to validate your needs. The update procedure tries to keep the settings, but new options have been added and others have been removed Please, double-check the above release notes before upgrading ### Upgrade from docebo ce 3.x, docebo ce 4.x You can directly upgrade your old docebo (either series 3.6.x and 4.x) installations to forma.lms 2.x The config.php file is completely changed from D36 and with more config options since D4.x The upgrade procedure changes the config.php for you and writes it (if writable), or requires you to download it and upload to the web root folder. Coming from D36, review the config.php and add your own settings, if needed. # General architecture and definitions ## Login and Registration [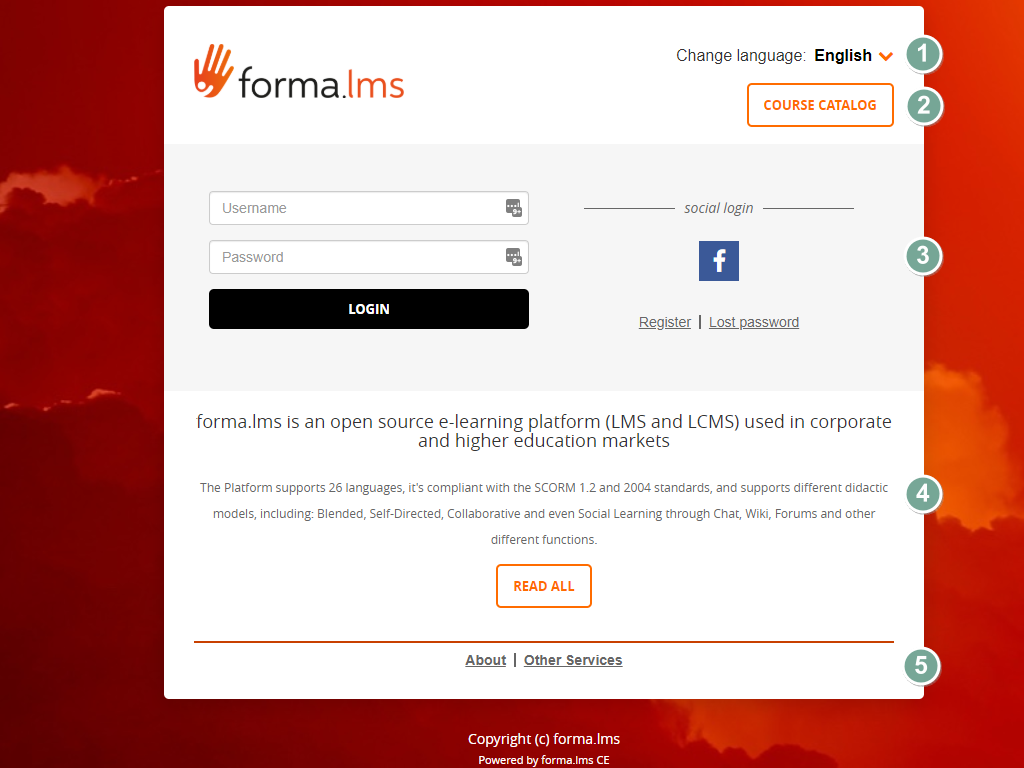](https://docs2.formalms.org/uploads/images/gallery/2024-01/image.png) [](https://docs2.formalms.org/uploads/images/gallery/2024-01/n8dimage.png) Main Layout Elements 1. **Language Selector** Change language for the login and registration page. This automatically detects the user browser language. Upon login, language will be set to the user profile language. 2. **Course Catalog** Opens the catalog of courses. Feature must be enabled from System Configuration elearning [settings.](https://docs2.formalms.org/books/reference-guide/page/system-configuration) 3. **Login and social login** Standard login form. Social login features can be activated from the [plugin manager.](https://docs2.formalms.org/books/reference-guide/page/plugin-management) 4. **Privacy Policy** Default privacy policy text can be edited in admin settings ## LMS Frontend & User Panel The frontend of the application hosts all the learning related features for both students and teachers. [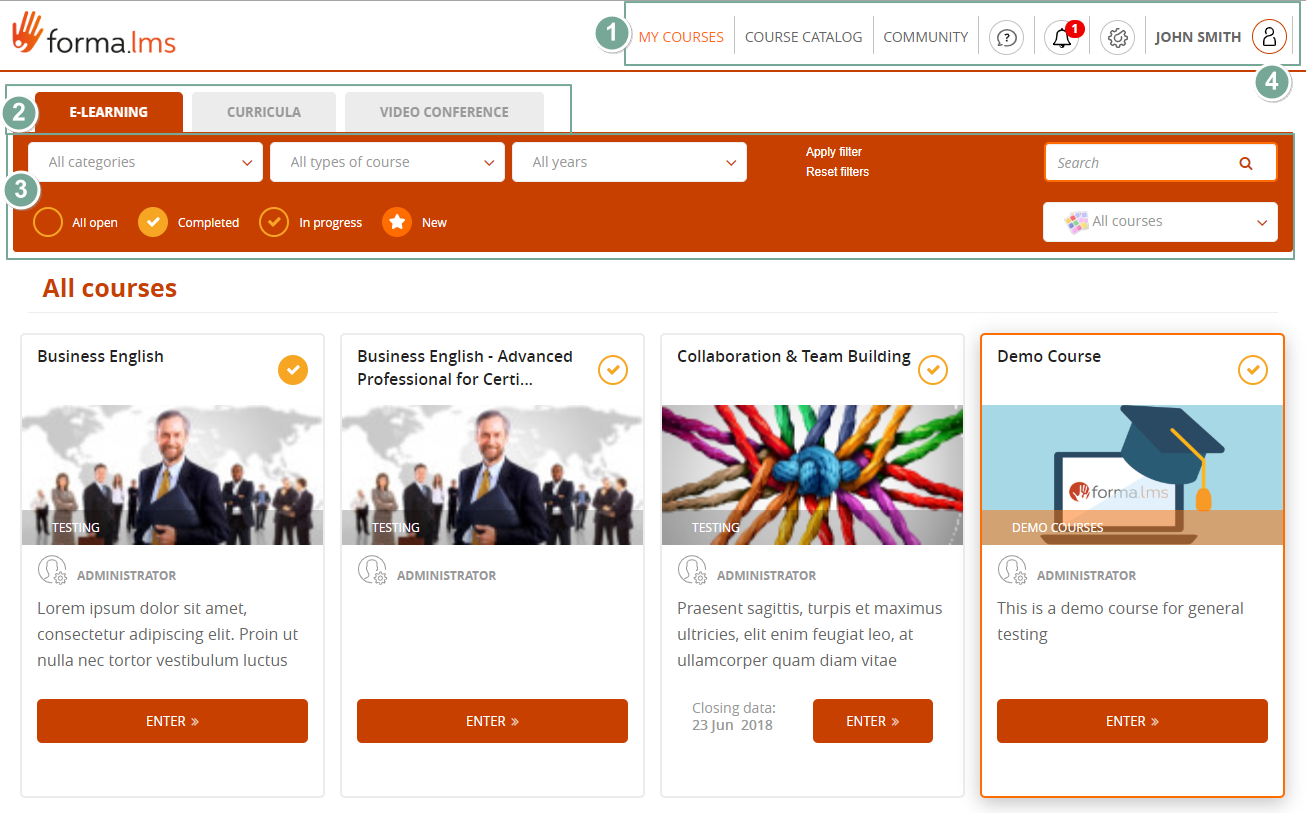](https://docs2.formalms.org/uploads/images/gallery/2024-01/zdhimage.png) [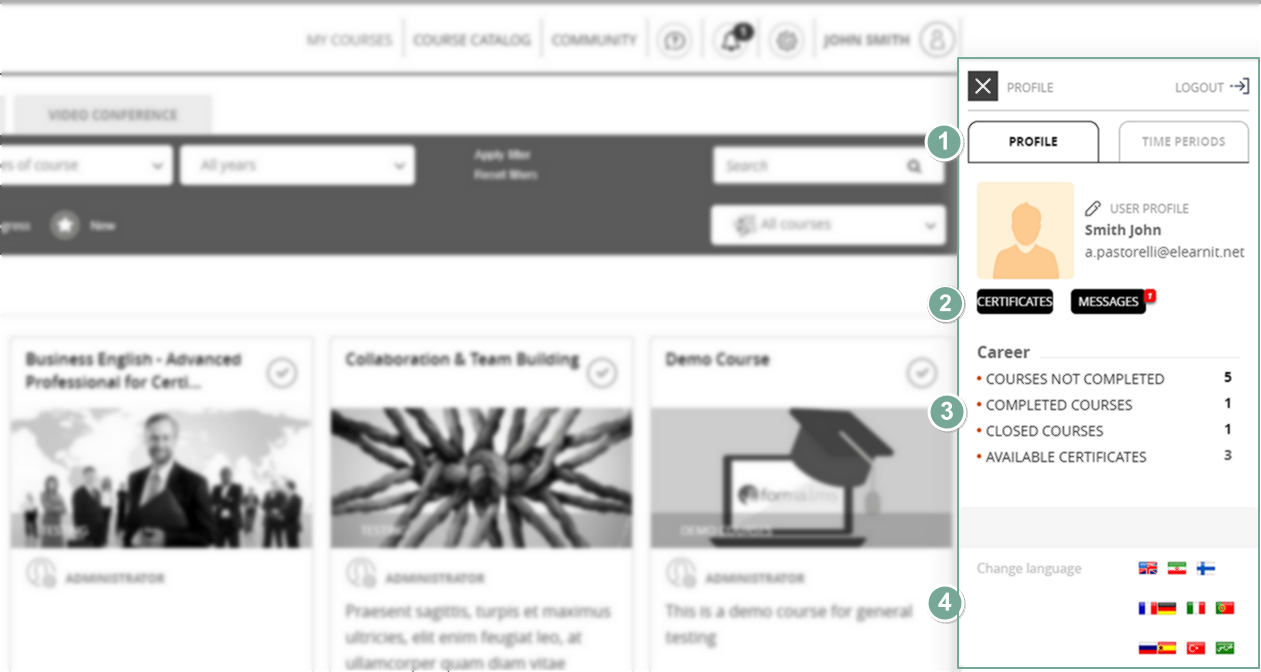](https://docs2.formalms.org/uploads/images/gallery/2024-01/Ao0image.png) Main Layout elements **1. Main Menu**: this is the main navigation menu, for all the general sections of the platform - **MyCourses**: in this section the user will find all the courses, coursepaths and training activities he is directly enrolled to. - **Catalog**: if enabled, this section will show the course catalog(s), with courses he can subscribe to - **Community**: general platform community forums - **Helpdesk**: a contact form to send support request to platform administrators - **New Certificates**: notification icon and link to alert for new available certificates for download - **Administration**: link to backend administration section, only available to administrators and superadministrators - **User Panel**: click on the username to open your own user panel **2. MyCourses Tab**s: access different areas of the MyCourses section, if enabled **3. Filters panel**: here a user can filter and search among the courses he is subscribed to: - Filter by course category - Filter by course type - Filter by year - Filter by status. The page by default will show all open courses, but you could filter them based on the user status on the course - Search by word on courses title, description, and category - Filter by course label: the “label” option must be enabled. Check [system configuration](https://docs2.formalms.org/books/reference-guide/page/system-configuration) #### User Panel This panel displays personal info and features for the user: **1. Profile**: if allowed by configuration, user can edit his own profile **2. User features**: - Certificates: go to mycertificate page - Messages: access the private messages feature **3. Career:** some basic stats about user activities **4. Language selector** ## Backend Administration This is the area of the application where most of the administrative operations happen, such as user management and course creation. [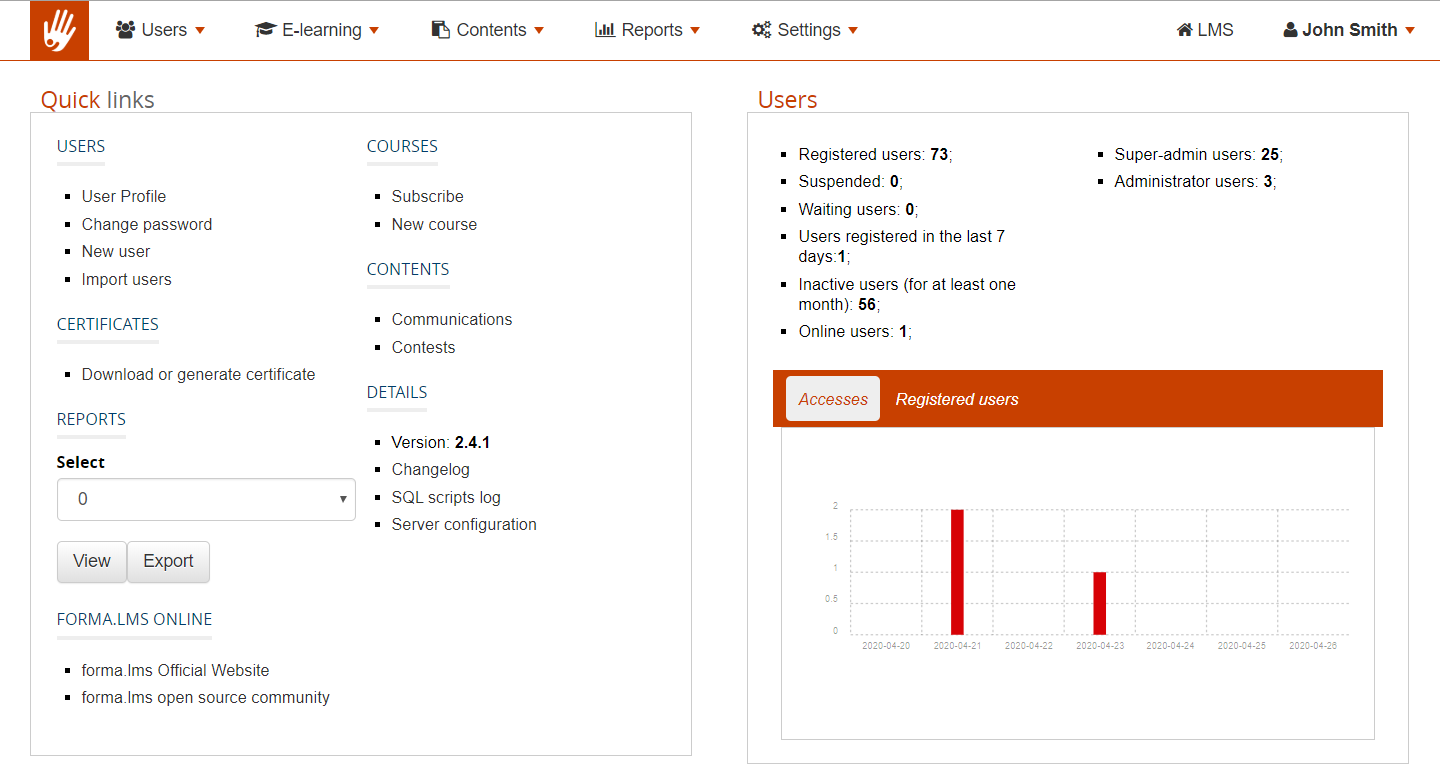](https://docs2.formalms.org/uploads/images/gallery/2024-01/Olpimage.png) ## Terms and Definitions