Contents and Communication
Features to manage content and communication such as external web pages, communications, and mailings
Private Messages
The “Messages” feature allow users to send each other private message through the LMS, that will be notified by email.
Enable the messages feature
The feature can be enabled and disabled, even just for some groups of users, from the “User Area LMS” configuration page
Admin > Settings > Elearning Configuration > User Area LMS
Check the User Area guide for details
Messages will be then accessible as a button from the user panel
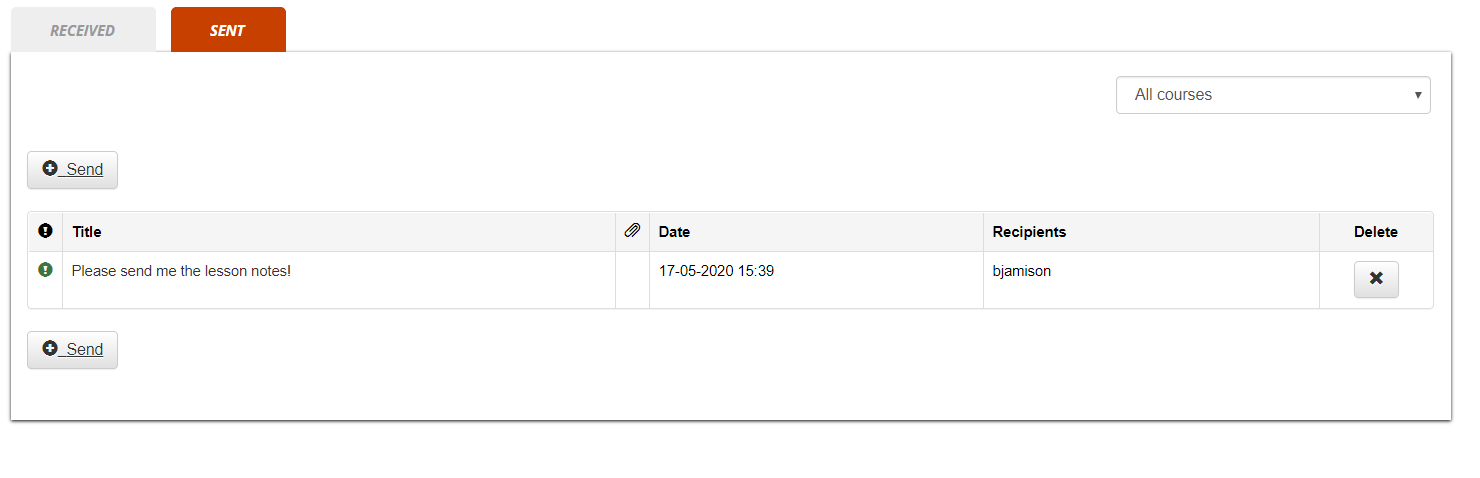
Send and receive messages
The system directly displays a list of the messages received by the user, it will be possible to send messages to one or multiple users.
Please note that:
- GodAdmin will be able to select any registered user
- Administrators will be able to select their assigned users
- Users will see only other users registered to their same courses
To send a new message, click “Send”, select the recipients from the list and compose the message.
Community Forums
Forma provides a global “Community Forums” feature, independent of course subscriptions, and featuring:
- Unlimited forums
- Forum moderation
- Notifications for new messages and threads
- Private threads
Separate forums with same features can be created also within each course, reserved to course users. Check the Course Forums guide for details
Activate Community Forums
You can activate / deactivate the community forums from the “User Area LMS” settings page:
Admin > Settings > Elearning Configuration > User Area LMS
You will be able to assign visibility over the whole community feature to:
- all the platform users
- only selected users / nodes
The link will be visible in the frontend main menu
Forums
Create a Forum
Forums can be created by platform administrators
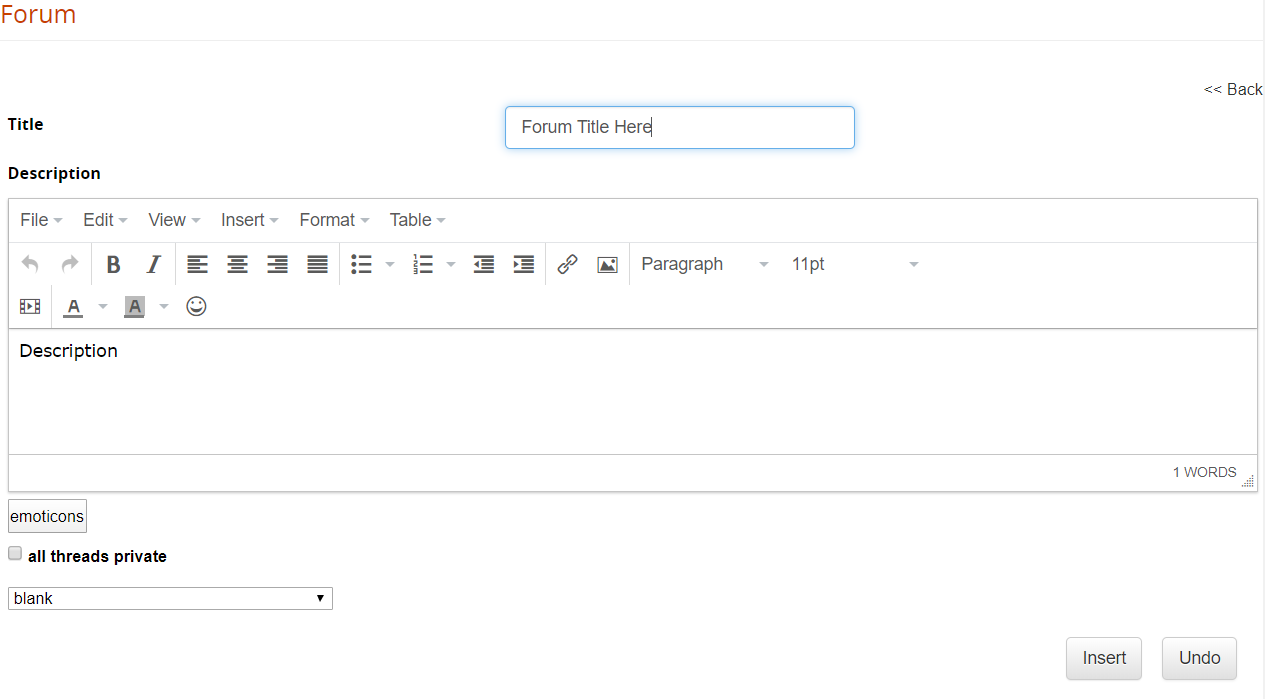
For each forum, you can set:
- Title: the forum name
- Description: a description for this discussion board
- Emoticon Image: an icon to identify the forum
- Private threads: define whether all the discussions in this board should be private by default.
Note
private discussion threads will be only visible to the user that opened the thread and forum moderators
TIP
use the “private threads” feature to create a private support board for your users
Manage Forums

Here you can:
- Change the forums order
- Select users that will be able to see this forum
- Download the discussion board in Excel format
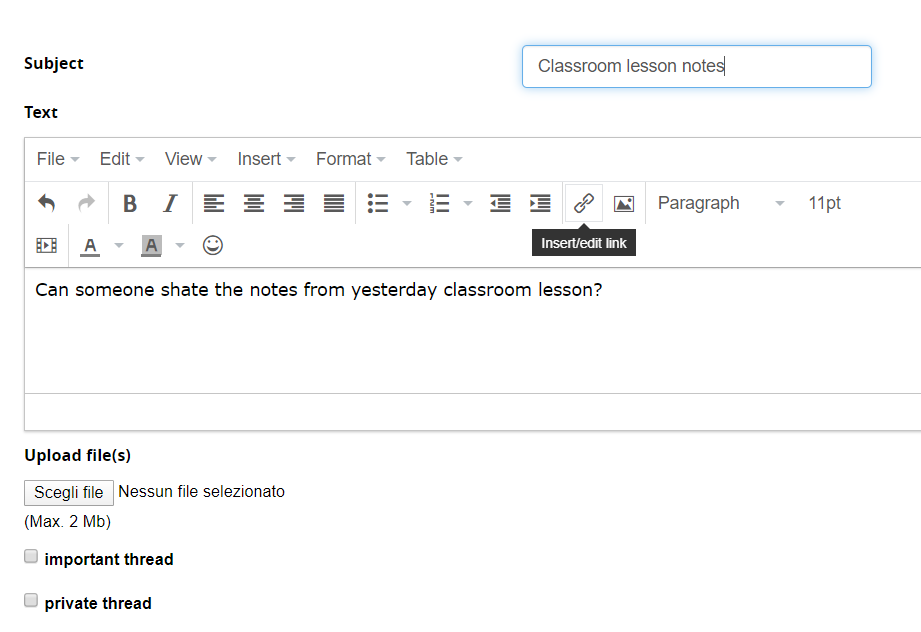
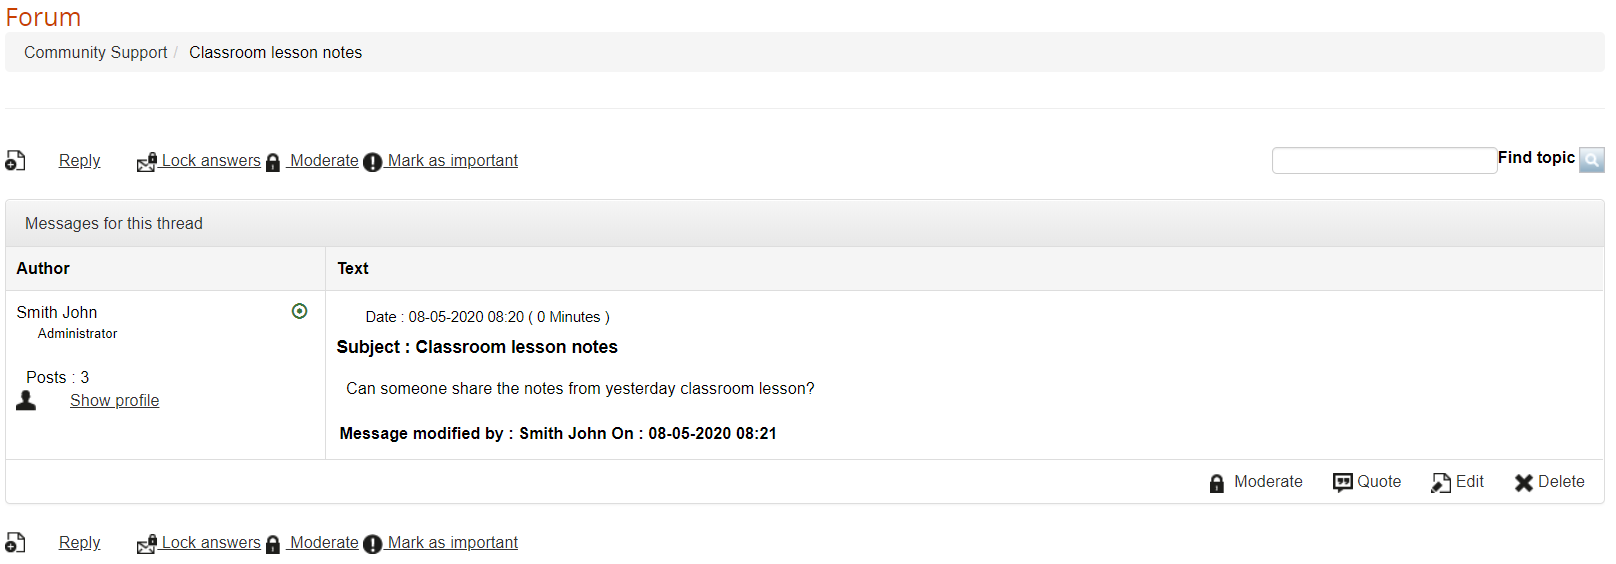
Discussion threads
For each forum, you can have unlimited discussion threads and messages
Add a new thread
Manage Threads
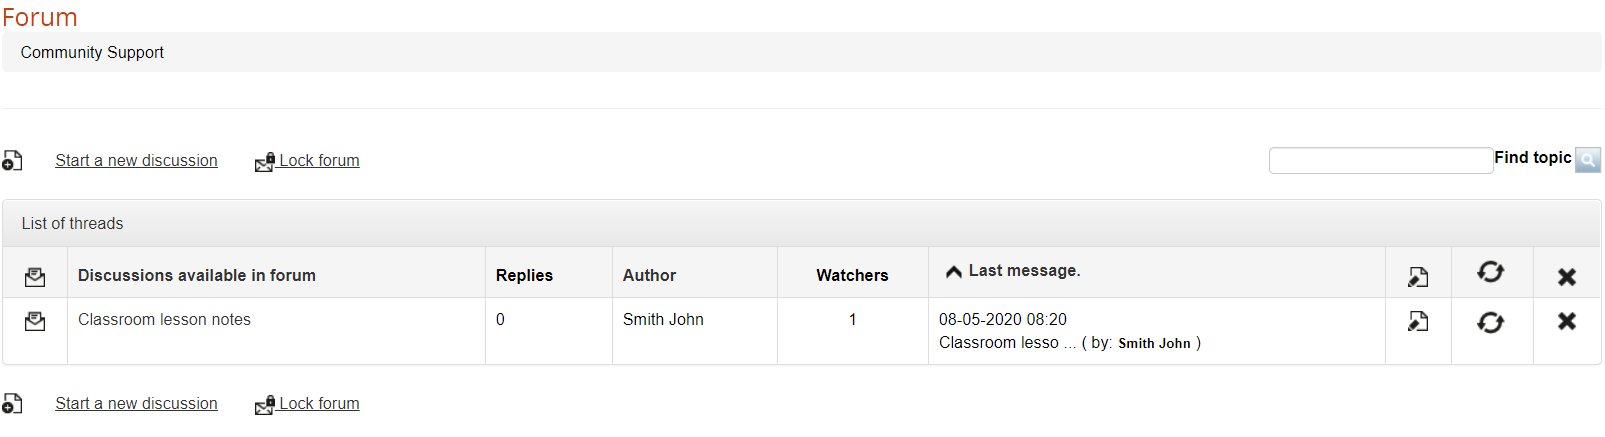
Manage Messages
Web Pages
Web Pages
In Forma you can manage HTML pages to be displayed either on the login page or in a dedicated tab inside the “mycourses” area.
Web pages can be added and managed from:
Admin > Contents > Web Pages
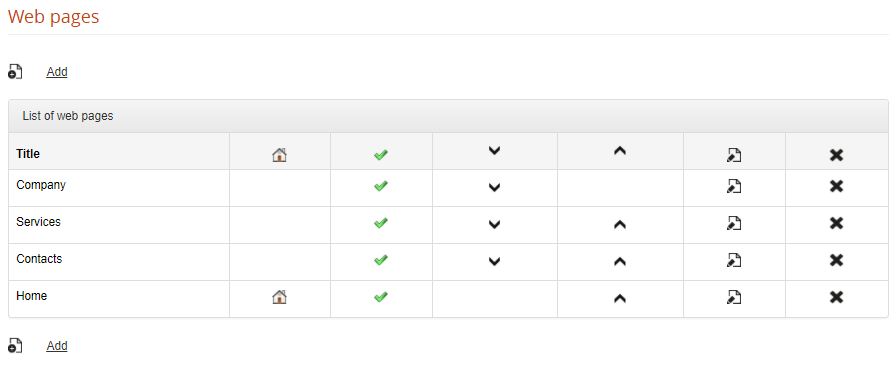
Click on the “ADD” button to create a web page and set:
Title: this is the title of the webpage, and will be used also as link text in the login menu for external pages
Language: the page will be visible to users viewing the site in the selected language. If a different language is selected, the link to this page won't be displayed.
Publish: Choose whether this page should be visible or not
Default page: this page will be used as content for the MyCourses “Home” Tab, and will be hidden on the login menu
Description: content of the page
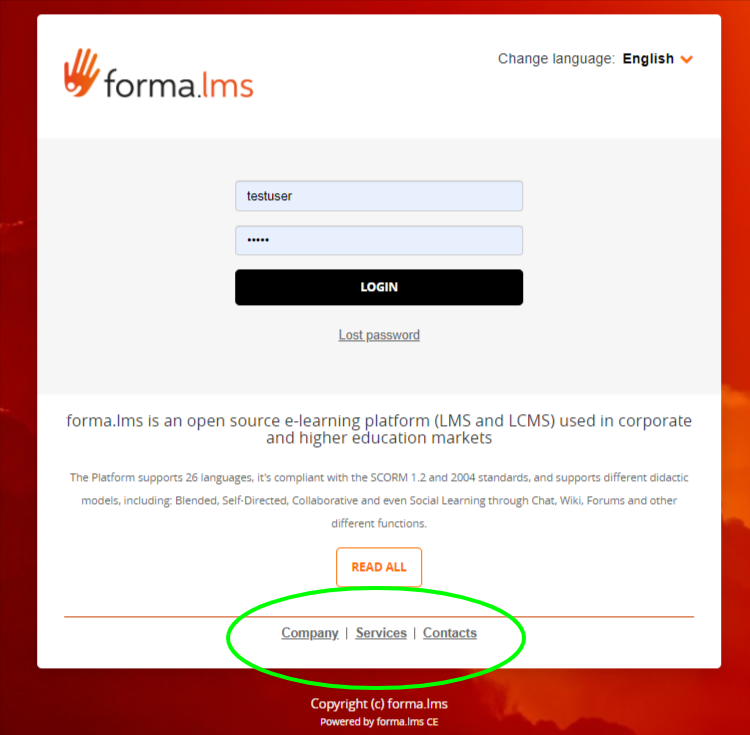
External Web Pages
All the published web pages, unless set as default, will be automatically shown as a menu on the login page:
Home Tab
The page selected as “default” will be used as a content for the “Home” Tab in MyCourses area, provided that Tab is active:

You can activate the home tab from the User Area management under:
Admin > Settings > Elearning Configuration > User Area LMS
The tab can be renamed from the standard language management area
Global Newsletter
The “Global Newsletter” feature will let you send massive emails to all or a selected group of users.
It is available under:
Admin > Contents > Newsletter
This feature is available only to platform superadministrators and administrators, and works in three basic steps:
- Compose your email
- Select the recipients
- Send the email
NOTE
if you need to send email only to a specific course users, check the Newsletter and Anouncement features in course management
Compose the email
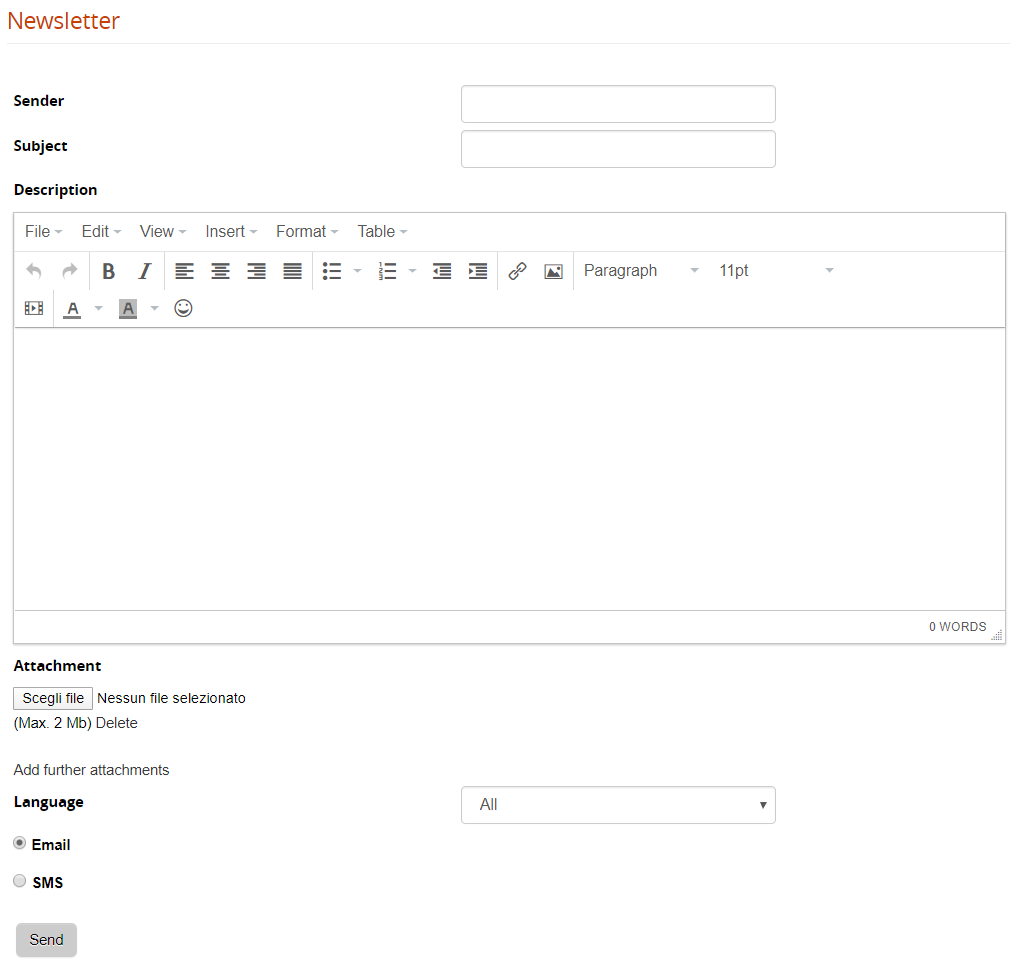
Sender: this field will be used as “reply-to” field. To avoid anti-spam and server security systems, the platform will send the emails with the default email and smtp setting.
Attachment: One or more attachments may be included in the newsletter.
Email/SMS: The communication can be sent by both e-mail and SMS. For SMS, an SMS service provider must be configured through the plugin system.
Language: choose which users should receive the email based on their profile language
Once you click the “SEND” button, you will be prompted to choose which users to send the communication.
Select the recipients
The system will open the user selection page, letting you select either:
- Multiple single users
- Massive select all users from some org-chart nodes
- Massive select all users in a group
- Massive select all users by company role
Click “Save Changes” to proceed to the last step
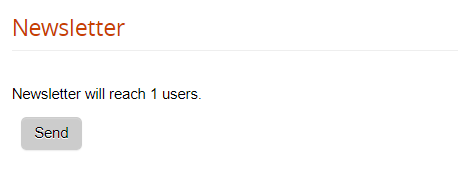
Send the email
As a last step, the system will present the number of selected users, click “SEND” button to push your communication out.
To avoid server anti-spam filters, the system will automatically split the massive mailing in multiple blocks of recipients, with a pause in seconds between each block.
You can configure values for blocks and pauses in advanced configuration settings